> For clean Markdown of any page, append .md to the page URL.
> For a complete documentation index, see https://docs.elacity.ai/llms.txt.
> For full documentation content, see https://docs.elacity.ai/llms-full.txt.
# Deploying Agents
Agents in Elacity combine a versioned prompt, tools, provider configuration, and an environment into a single deployable unit. When you deploy an agent, Elacity compiles everything together and pushes it to your target provider (e.g. VAPI, Ultravox, or Telnyx).
This guide walks through deploying a simple voice agent to [VAPI](https://vapi.ai) with a versioned prompt and an API request tool.
## Prerequisites
Before deploying, make sure you have:
* A [prompt registry](/environment-setup#set-up-a-prompt-registry) with at least one published prompt
* An [environment](/environment-setup#add-an-environment) with VAPI provider credentials configured
* A VAPI account with an API key (added to your environment's provider config)
## Example: Deploy a VAPI Voice Agent
This example creates a simple customer-lookup agent that can query an external API during a call.
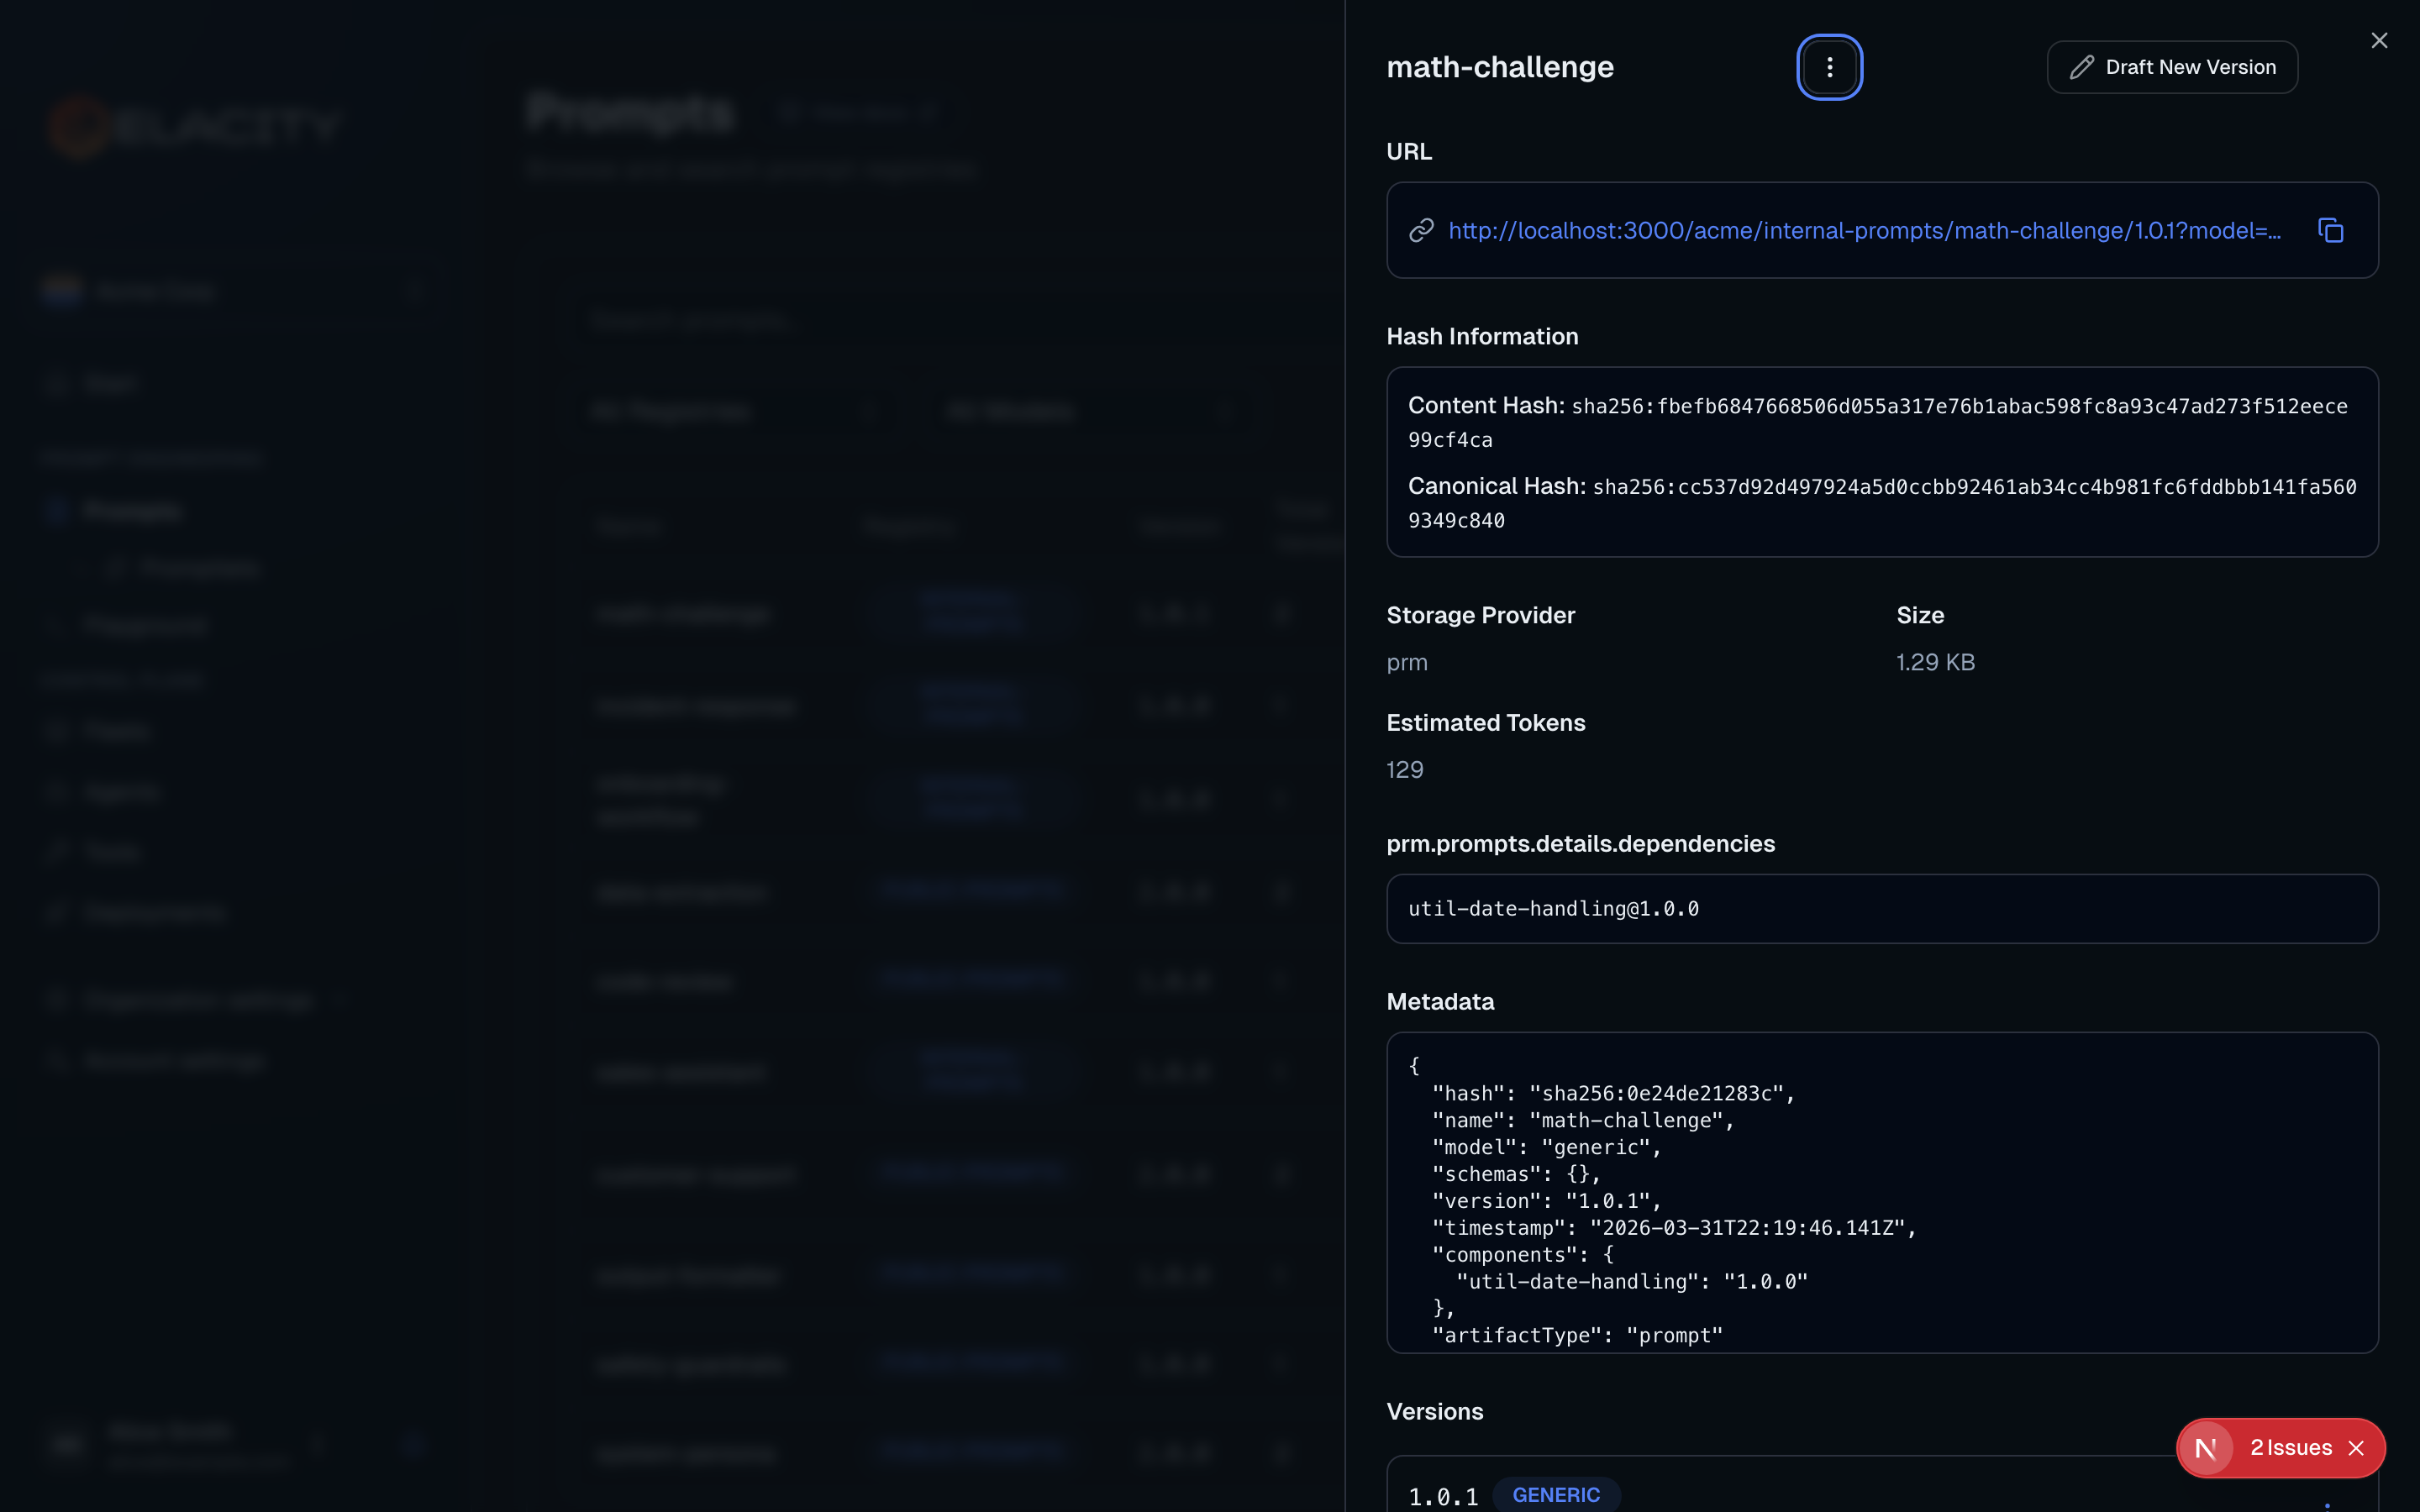
Publish a prompt to your registry. For this example, we'll use a prompt called `customer-lookup` at version `1.0.0`:
```text
You are a helpful customer service agent for {{COMPANY_NAME}}.
When a caller asks about their account, use the lookup_customer tool
to retrieve their information by phone number or email.
Be concise, friendly, and professional. If you cannot find the
caller's account, offer to transfer them to a human agent.
```
The `{{COMPANY_NAME}}` variable will be replaced with the value from your environment at deployment time.
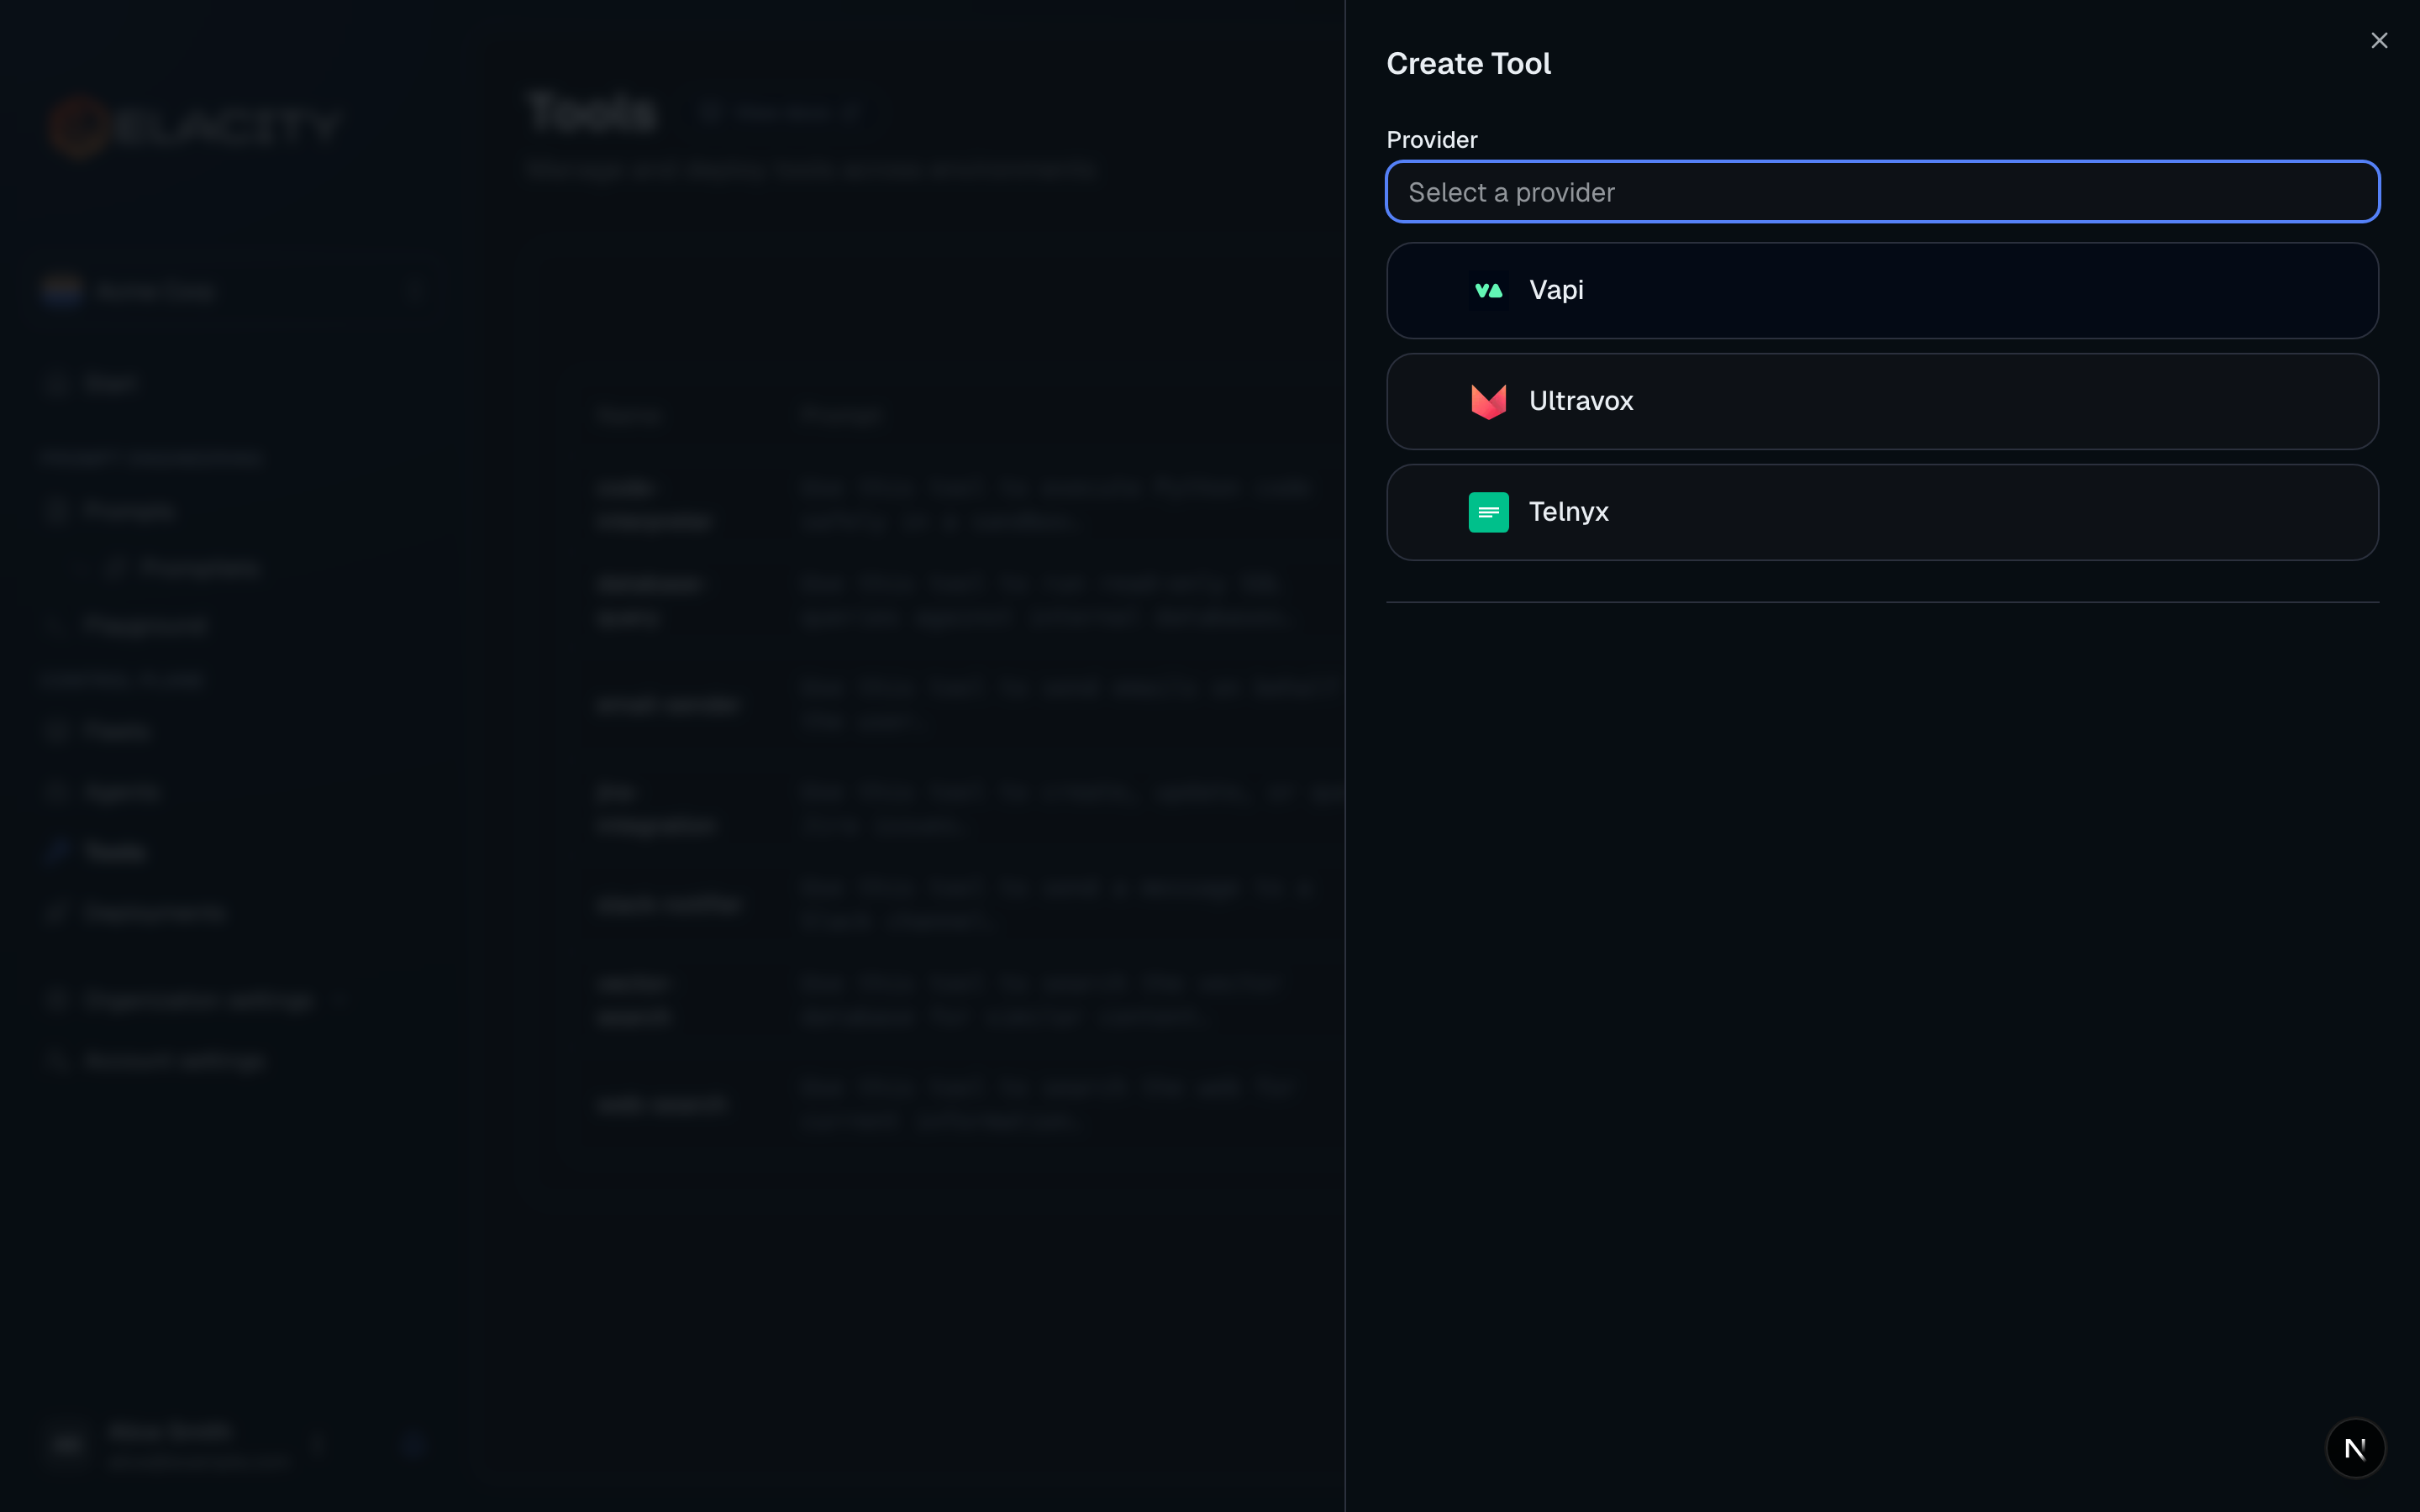
Navigate to **Tools** and create a new tool with the following configuration:
**Tool settings:**
| Field | Value |
| --------------- | ------------------------------------------- |
| **Name** | `lookup_customer` |
| **Type** | API Request |
| **Description** | Look up a customer by phone number or email |
| **Version** | `1.0.0` |
**Provider configuration (VAPI):**
```json
{
"method": "GET",
"url": "https://api.yourcompany.com/customers/lookup",
"headers": {
"Authorization": "Bearer ${CUSTOMER_API_KEY}"
},
"function": {
"name": "lookup_customer",
"parameters": {
"type": "object",
"properties": {
"phone": {
"type": "string",
"description": "Customer phone number"
},
"email": {
"type": "string",
"description": "Customer email address"
}
}
}
},
"timeoutSeconds": 10
}
```
The `${CUSTOMER_API_KEY}` variable is resolved from your environment's secrets at deployment time — the actual key is never embedded in the tool definition.
Navigate to **Agents** and click **Create Agent**. Configure it with:
| Field | Value |
| -------------- | ------------------------ |
| **Name** | Customer Lookup Agent |
| **Stable Key** | `customer-lookup-agent` |
| **Provider** | VAPI |
| **Prompt** | `customer-lookup@1.0.0` |
| **Tools** | `lookup_customer@^1.0.0` |
**Provider configuration:**
```json
{
"model": {
"provider": "openai",
"model": "gpt-4o",
"temperature": 0.3
},
"voice": {
"provider": "vapi",
"voiceId": "sarah"
},
"transcriber": {
"provider": "deepgram",
"model": "nova-2",
"language": "en"
},
"firstMessage": "Hi, thanks for calling! How can I help you today?"
}
```

Before deploying, preview what will be sent to VAPI. Click **Deploy** and select your target environment (e.g. `dev`).
The deployment preview shows:
* The compiled prompt with variables resolved and promptlets expanded
* Tools that will be attached to the agent
* The full provider configuration
* A content hash for drift detection

Confirm and dispatch the deployment. Elacity will:
1. Compile the prompt with environment-specific variables
2. Deploy the tool to VAPI (creating it if new, updating if changed)
3. Create or update the VAPI assistant with the compiled prompt and attached tools
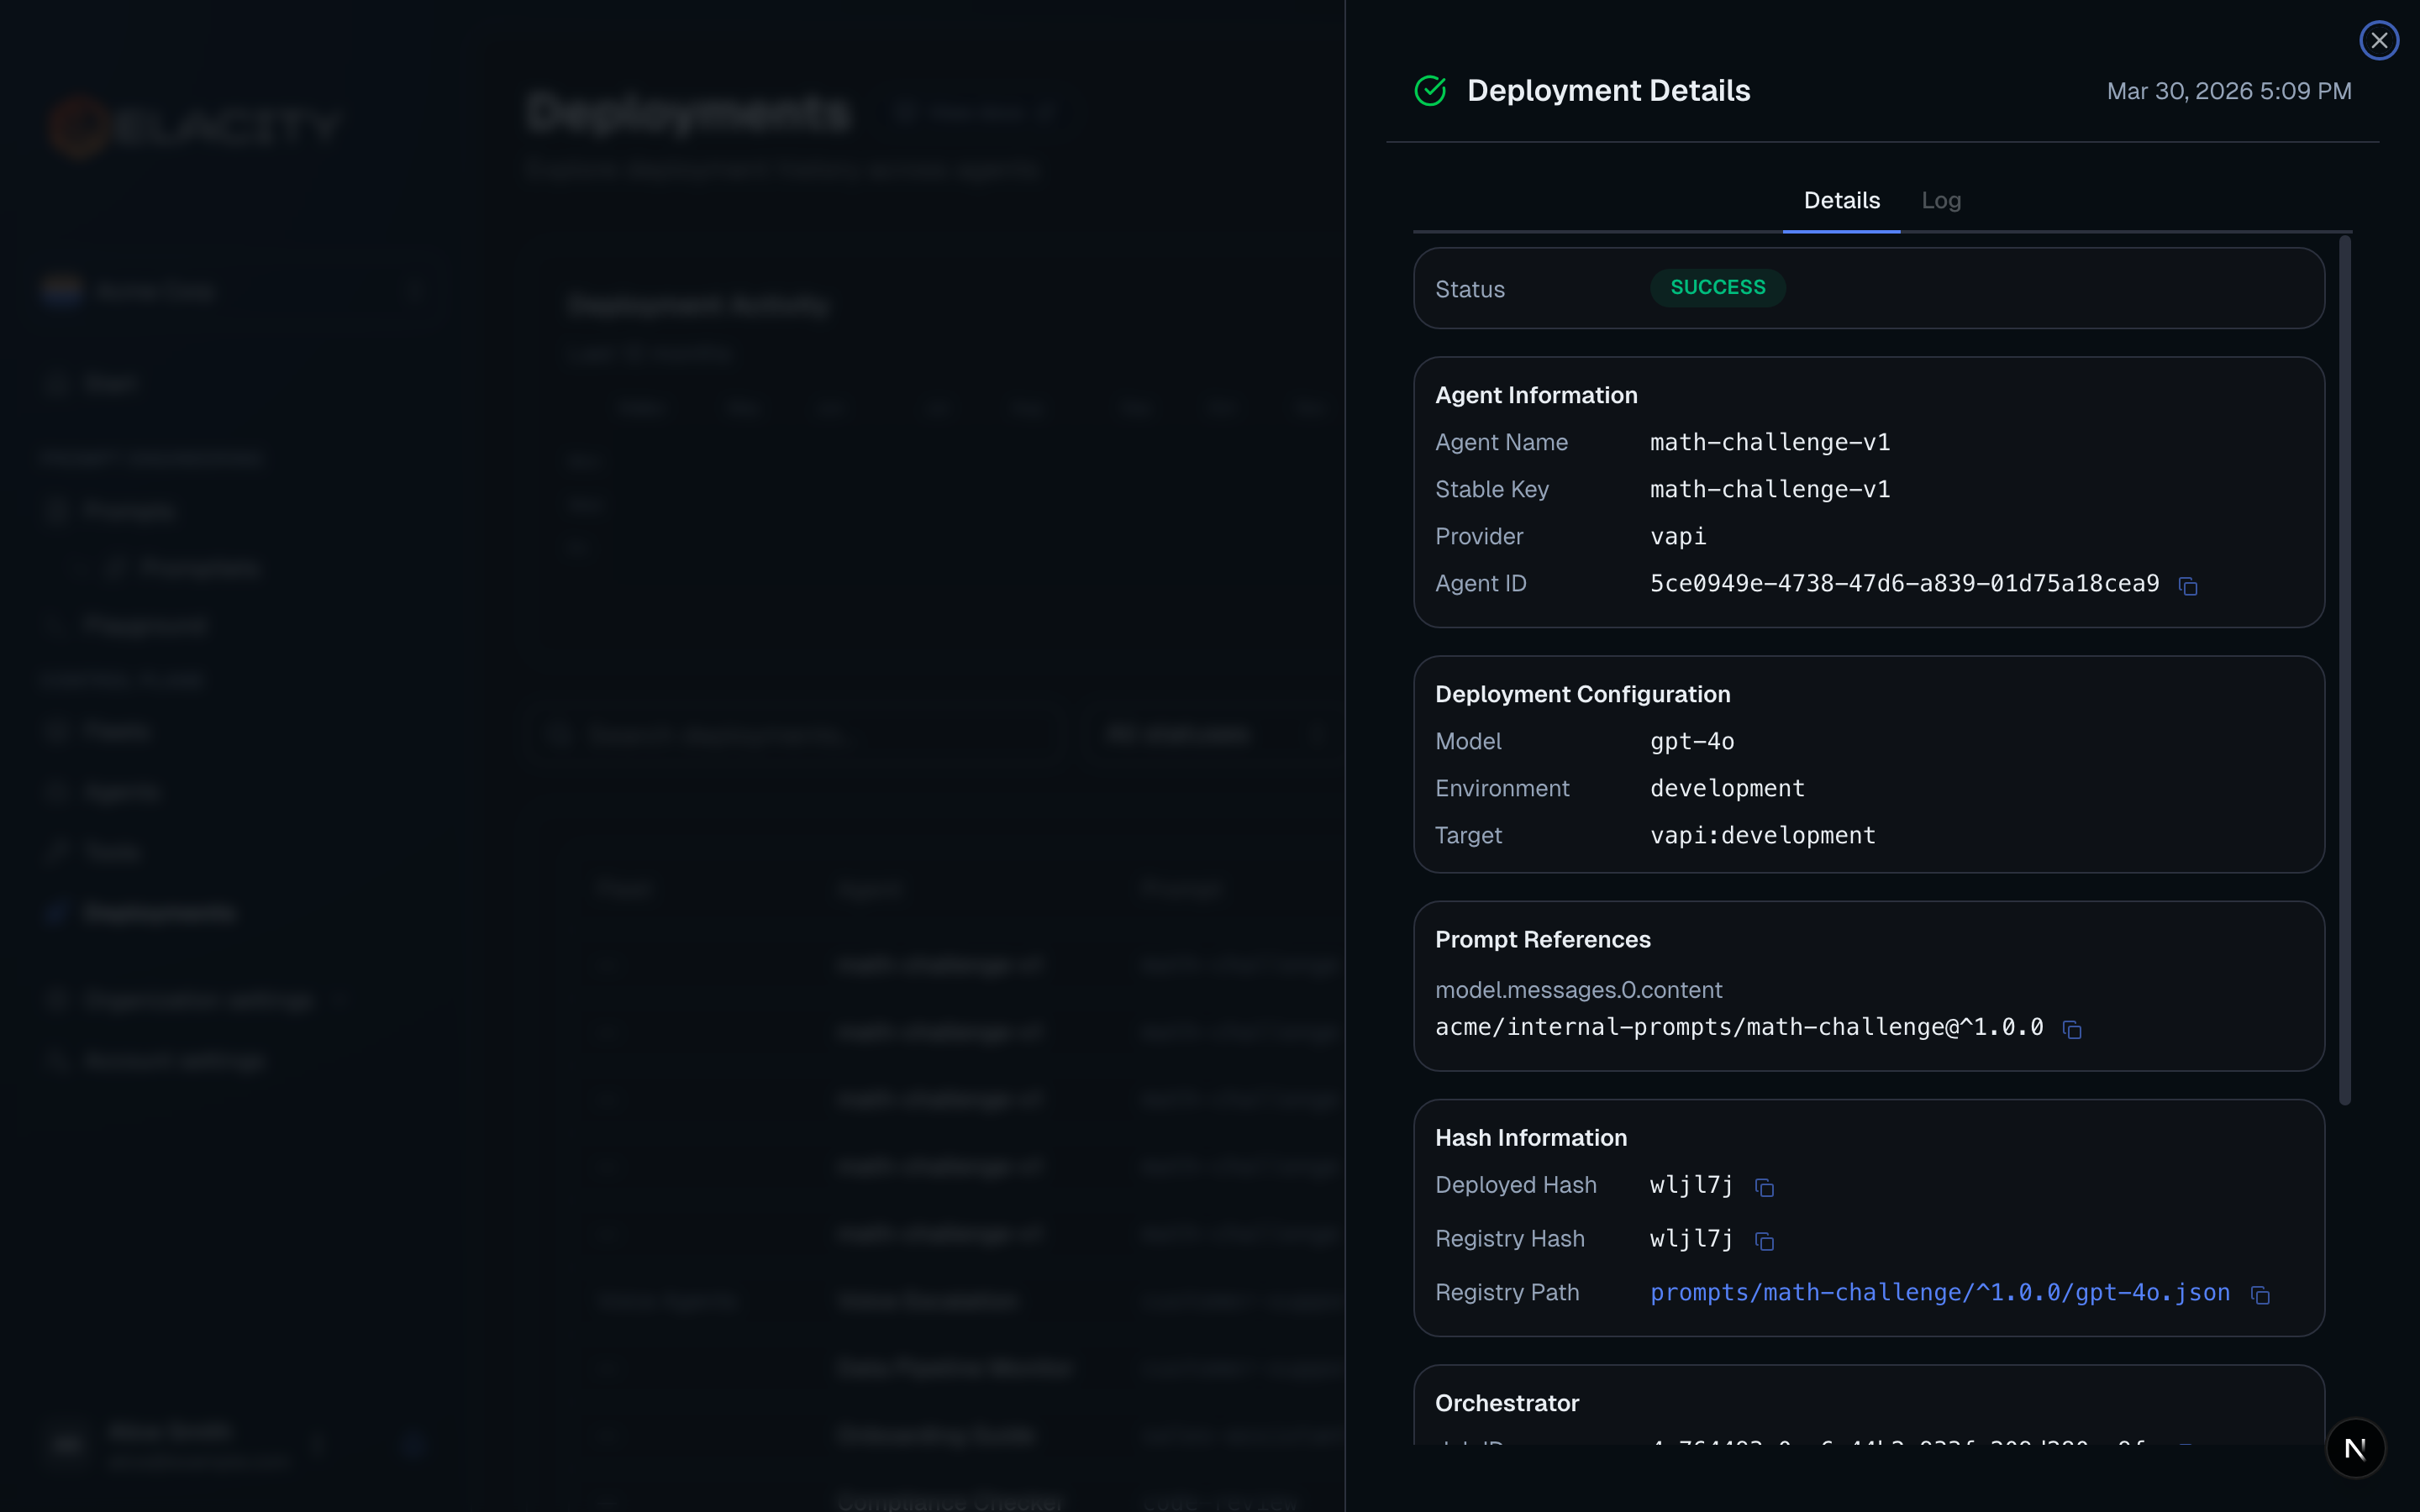
4. Record the deployment for audit and drift detection
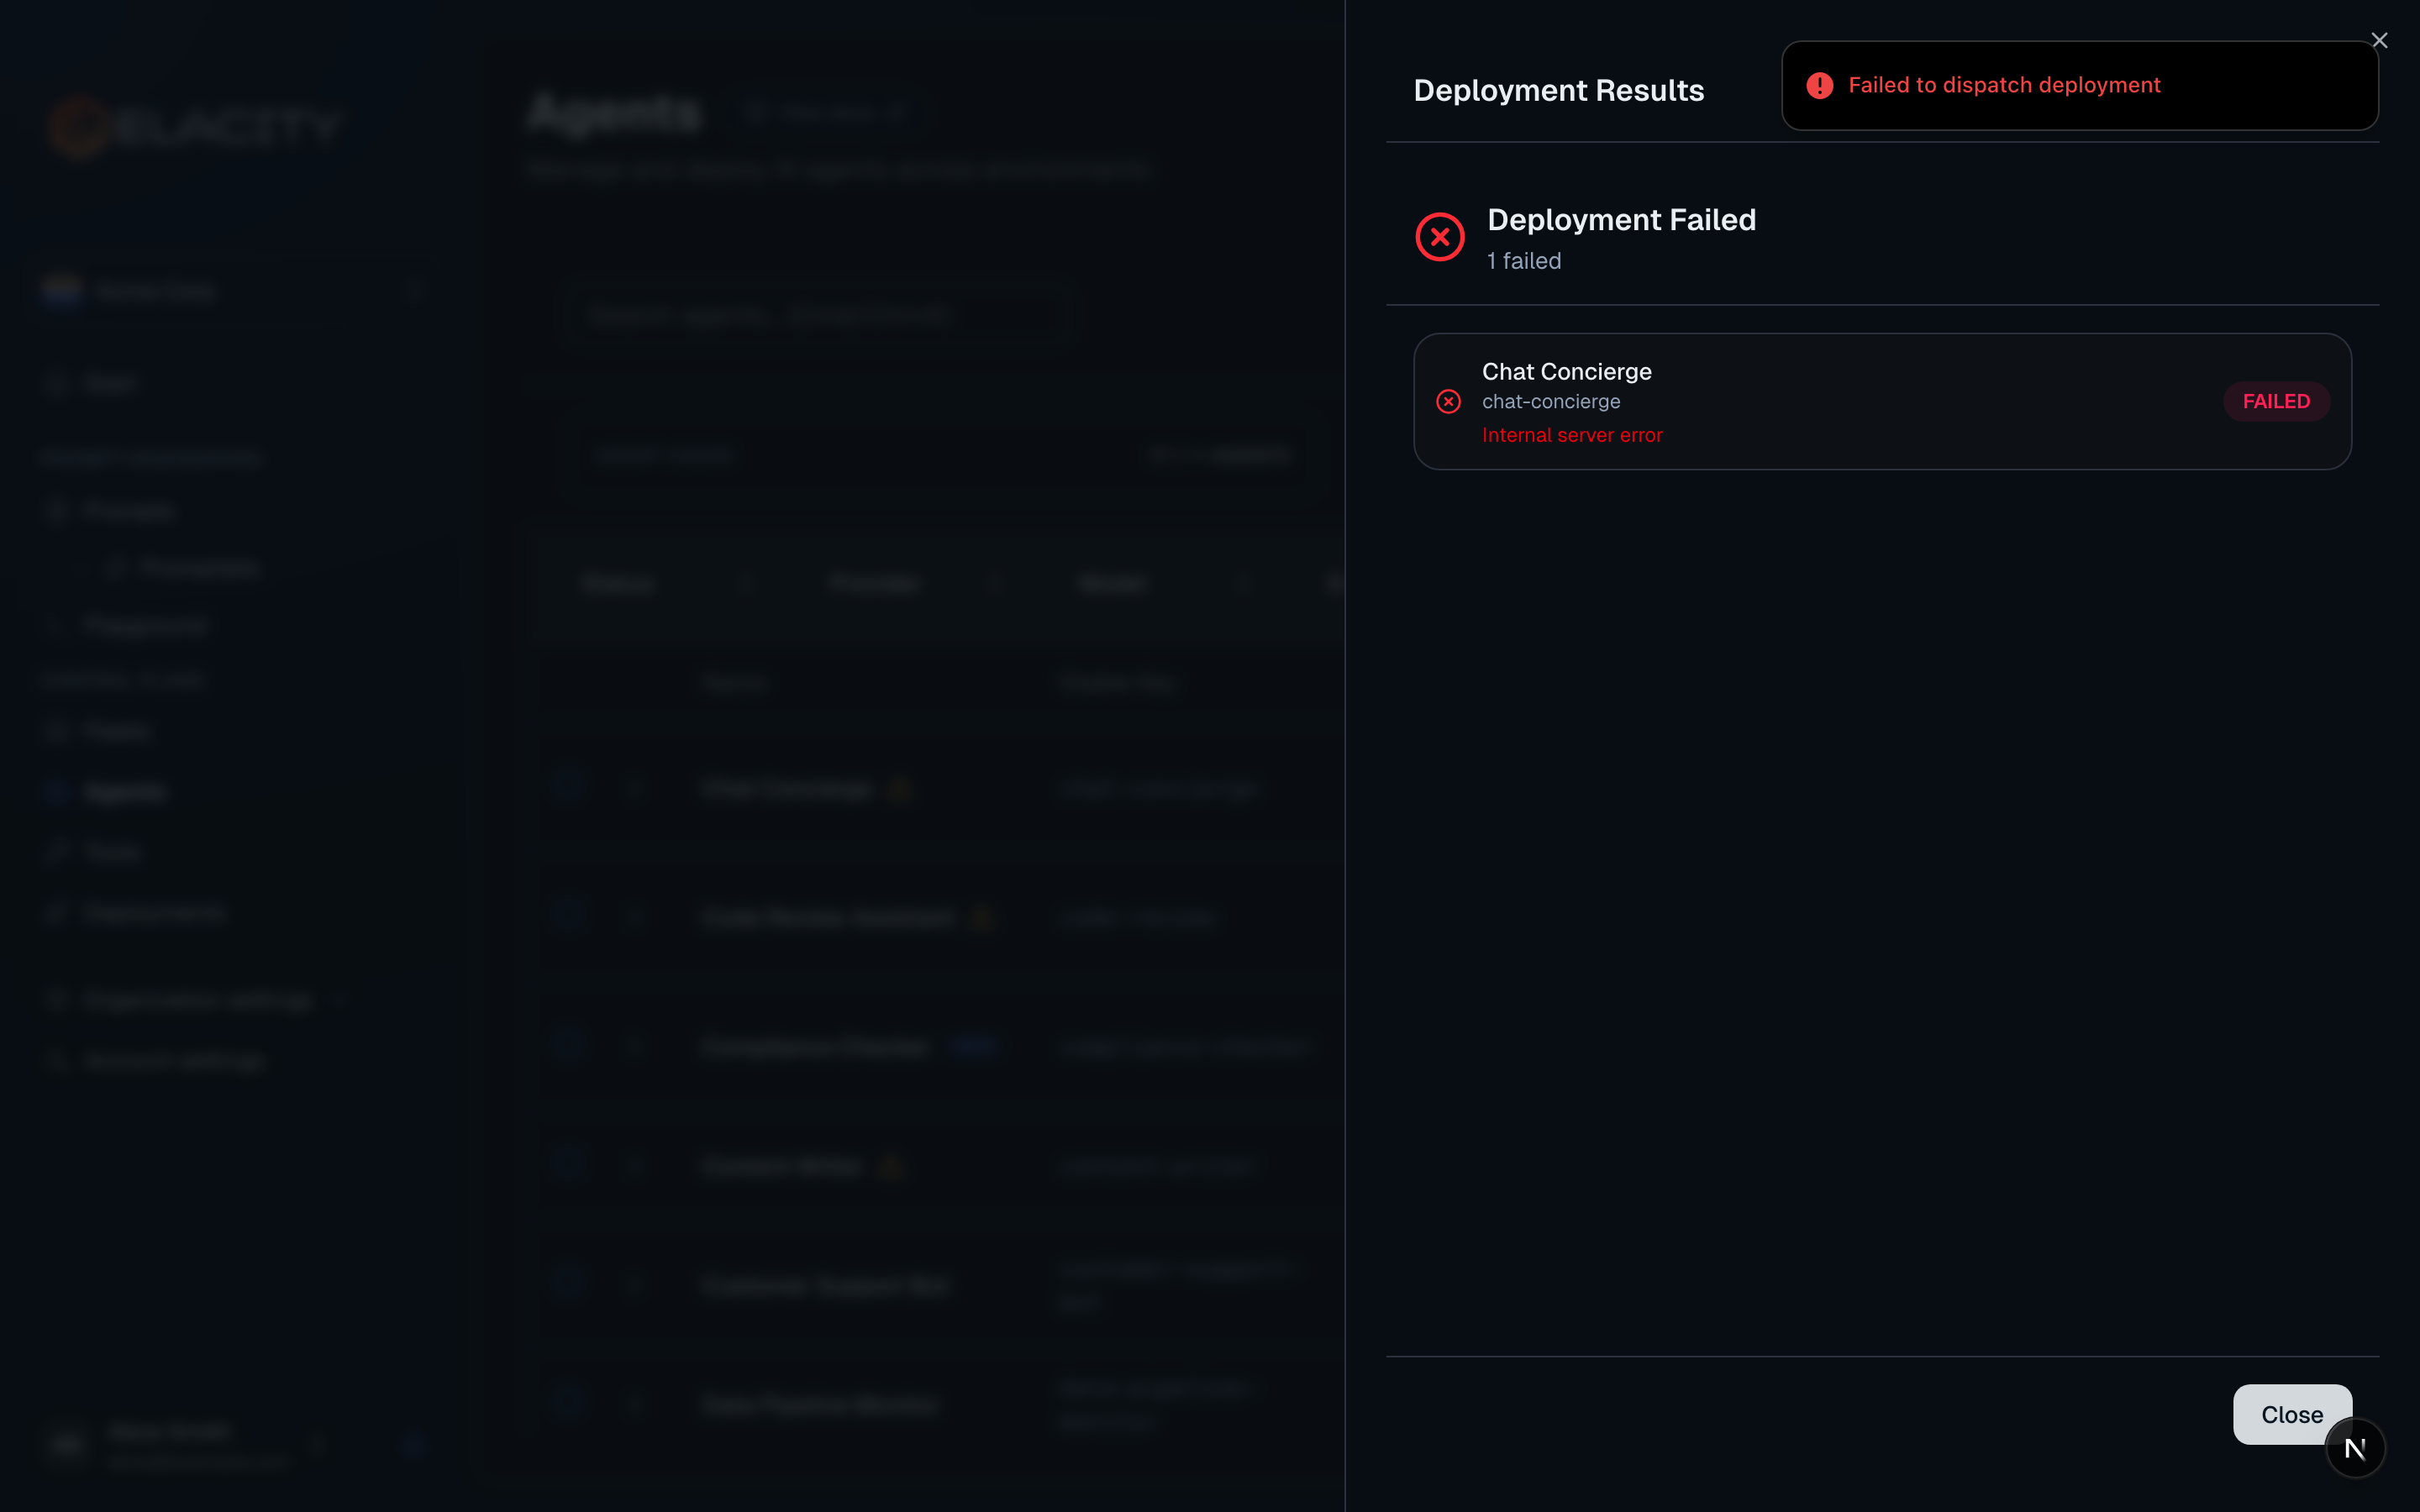
Once complete, the agent status will show as **Healthy** with the deployed version and environment.
## What Happens During Deployment
When you deploy an agent, Elacity orchestrates the following behind the scenes:
1. **Prompt compilation** — the raw prompt is fetched from the registry, promptlets are inlined, environment variables are substituted, and model-specific preprocessors run
2. **Tool deployment** — each referenced tool is created or updated in the provider's system (e.g. VAPI tool API)
3. **Agent deployment** — the provider assistant is created or updated with the compiled prompt, tool references, model settings, and voice configuration
4. **Hash recording** — a content hash of the entire deployment is stored for drift detection; if someone changes the agent directly in VAPI, Elacity will flag it as "drifted"
## Deployment Features
### Approval Gates
For sensitive environments (e.g. `prod`), you can enable approval gates that require team members to approve a deployment before it executes. Configure this in your environment settings.
### Drift Detection
After deployment, Elacity can verify that the agent in the provider still matches what was deployed. If someone modifies the agent directly in VAPI (outside of Elacity), the agent status changes to **Drifted** so you can investigate and redeploy if needed.
### Rollbacks
Because every prompt version is immutable, rolling back is as simple as redeploying a previous version. Select the prior version in the deployment flow and deploy — the agent will be updated to match the older prompt.
## Next steps
Learn more about versioning and pulling prompts
Explore the full API for programmatic deployments