> For clean Markdown of any page, append .md to the page URL.
> For a complete documentation index, see https://docs.elacity.ai/llms.txt.
> For full documentation content, see https://docs.elacity.ai/llms-full.txt.
# Environment Setup
This guide walks you through setting up the core building blocks of Elacity: a prompt registry, an environment, and optionally a fleet and LLM provider. By the end you'll have a working foundation for versioning and deploying prompts.
## Set up a Prompt Registry
A registry is where your versioned prompt artifacts live — think of it as a package repository scoped to your organization.
From your organization dashboard, click **Registries** in the sidebar.
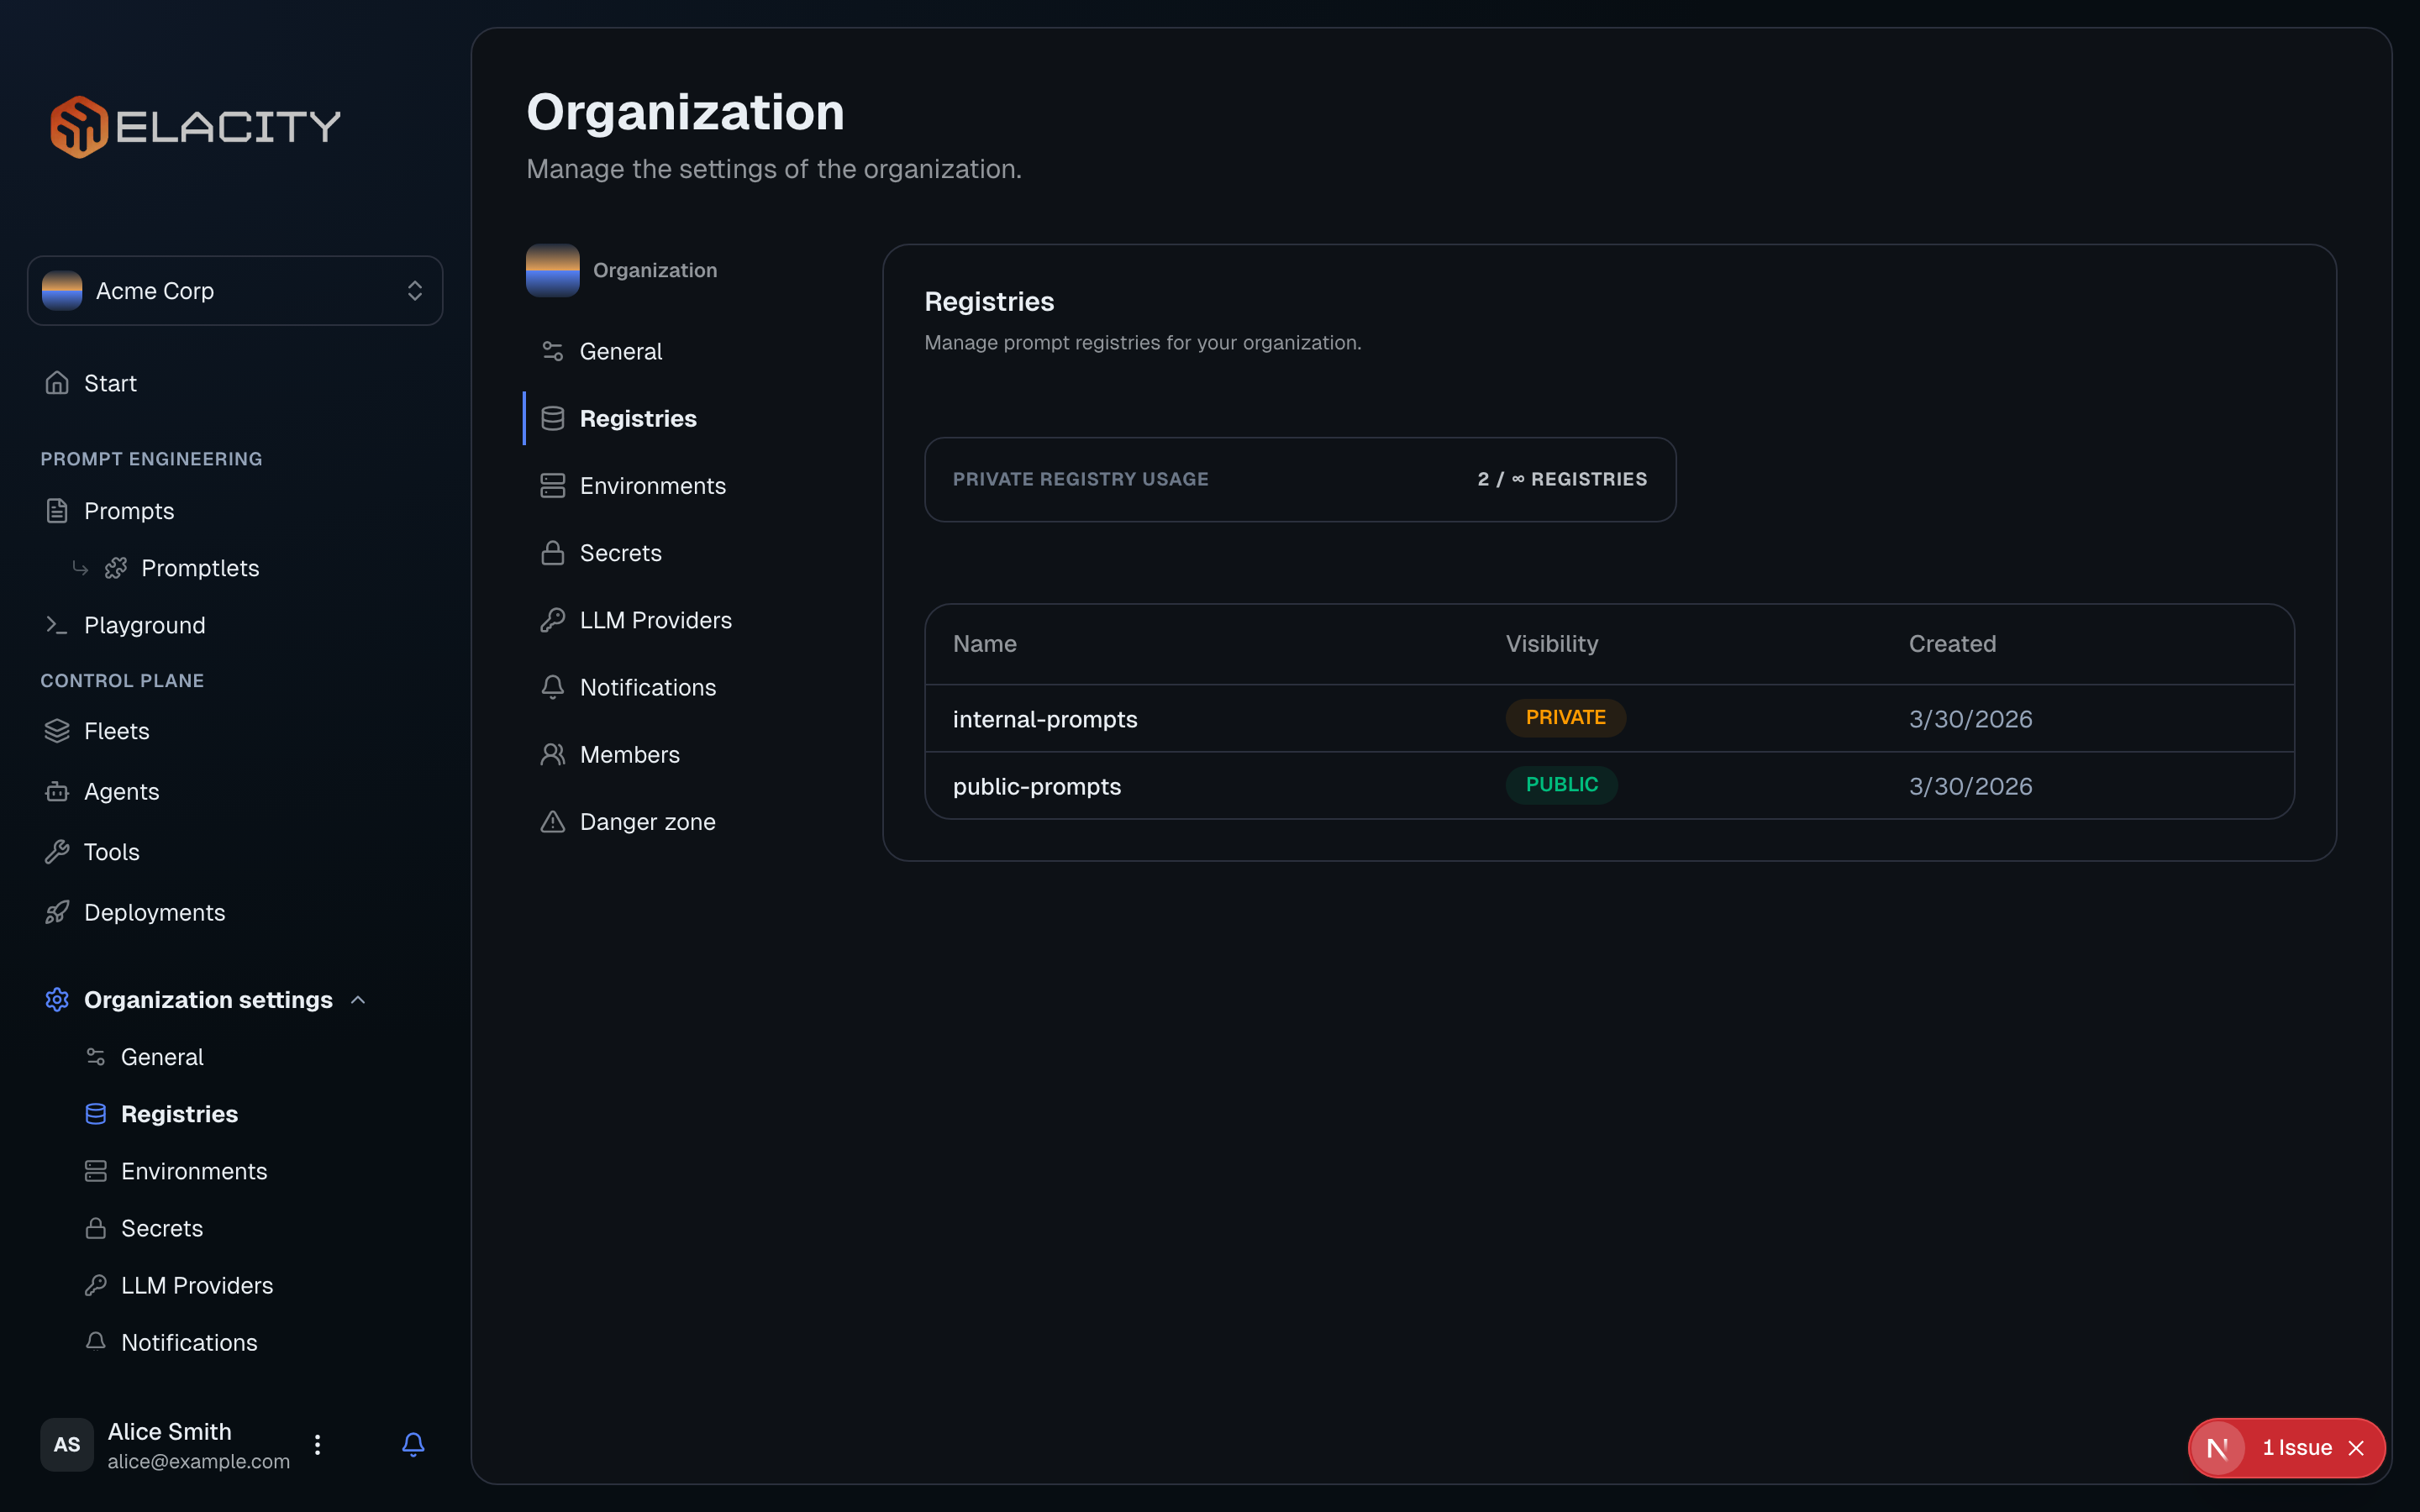
Click **Create Registry** and fill in:
* **Name** — a human-readable label (e.g. "Production Prompts")
* **Visibility** — choose **Public** or **Private**

### Public vs Private Registries
| | Public | Private |
| -------------- | --------------------------------------------------------- | ------------------------------------------------------------- |
| **Access** | Anyone can read without authentication | Restricted to org members and API keys |
| **Use case** | Open-source prompts, community templates, shared examples | Proprietary prompts, internal agent logic, production systems |
| **API access** | No `X-API-Key` header required | Requires a valid `X-API-Key` header |
**Accessing a public registry** — no authentication needed:
```bash
curl "https://elacity.ai/api/registries/artifact-versions/content?\
registryRef=your-org/public-prompts&\
promptName=greeting&\
version=1.0.0&\
model=generic"
```
**Accessing a private registry** — requires your API key:
```bash
curl -H "X-API-Key: YOUR_API_KEY" \
"https://elacity.ai/api/registries/artifact-versions/content?\
registryRef=your-org/internal-prompts&\
promptName=greeting&\
version=1.0.0&\
model=generic"
```
Public registries are great for sharing prompt templates with the community or across teams. Use private registries for anything you don't want exposed outside your organization.
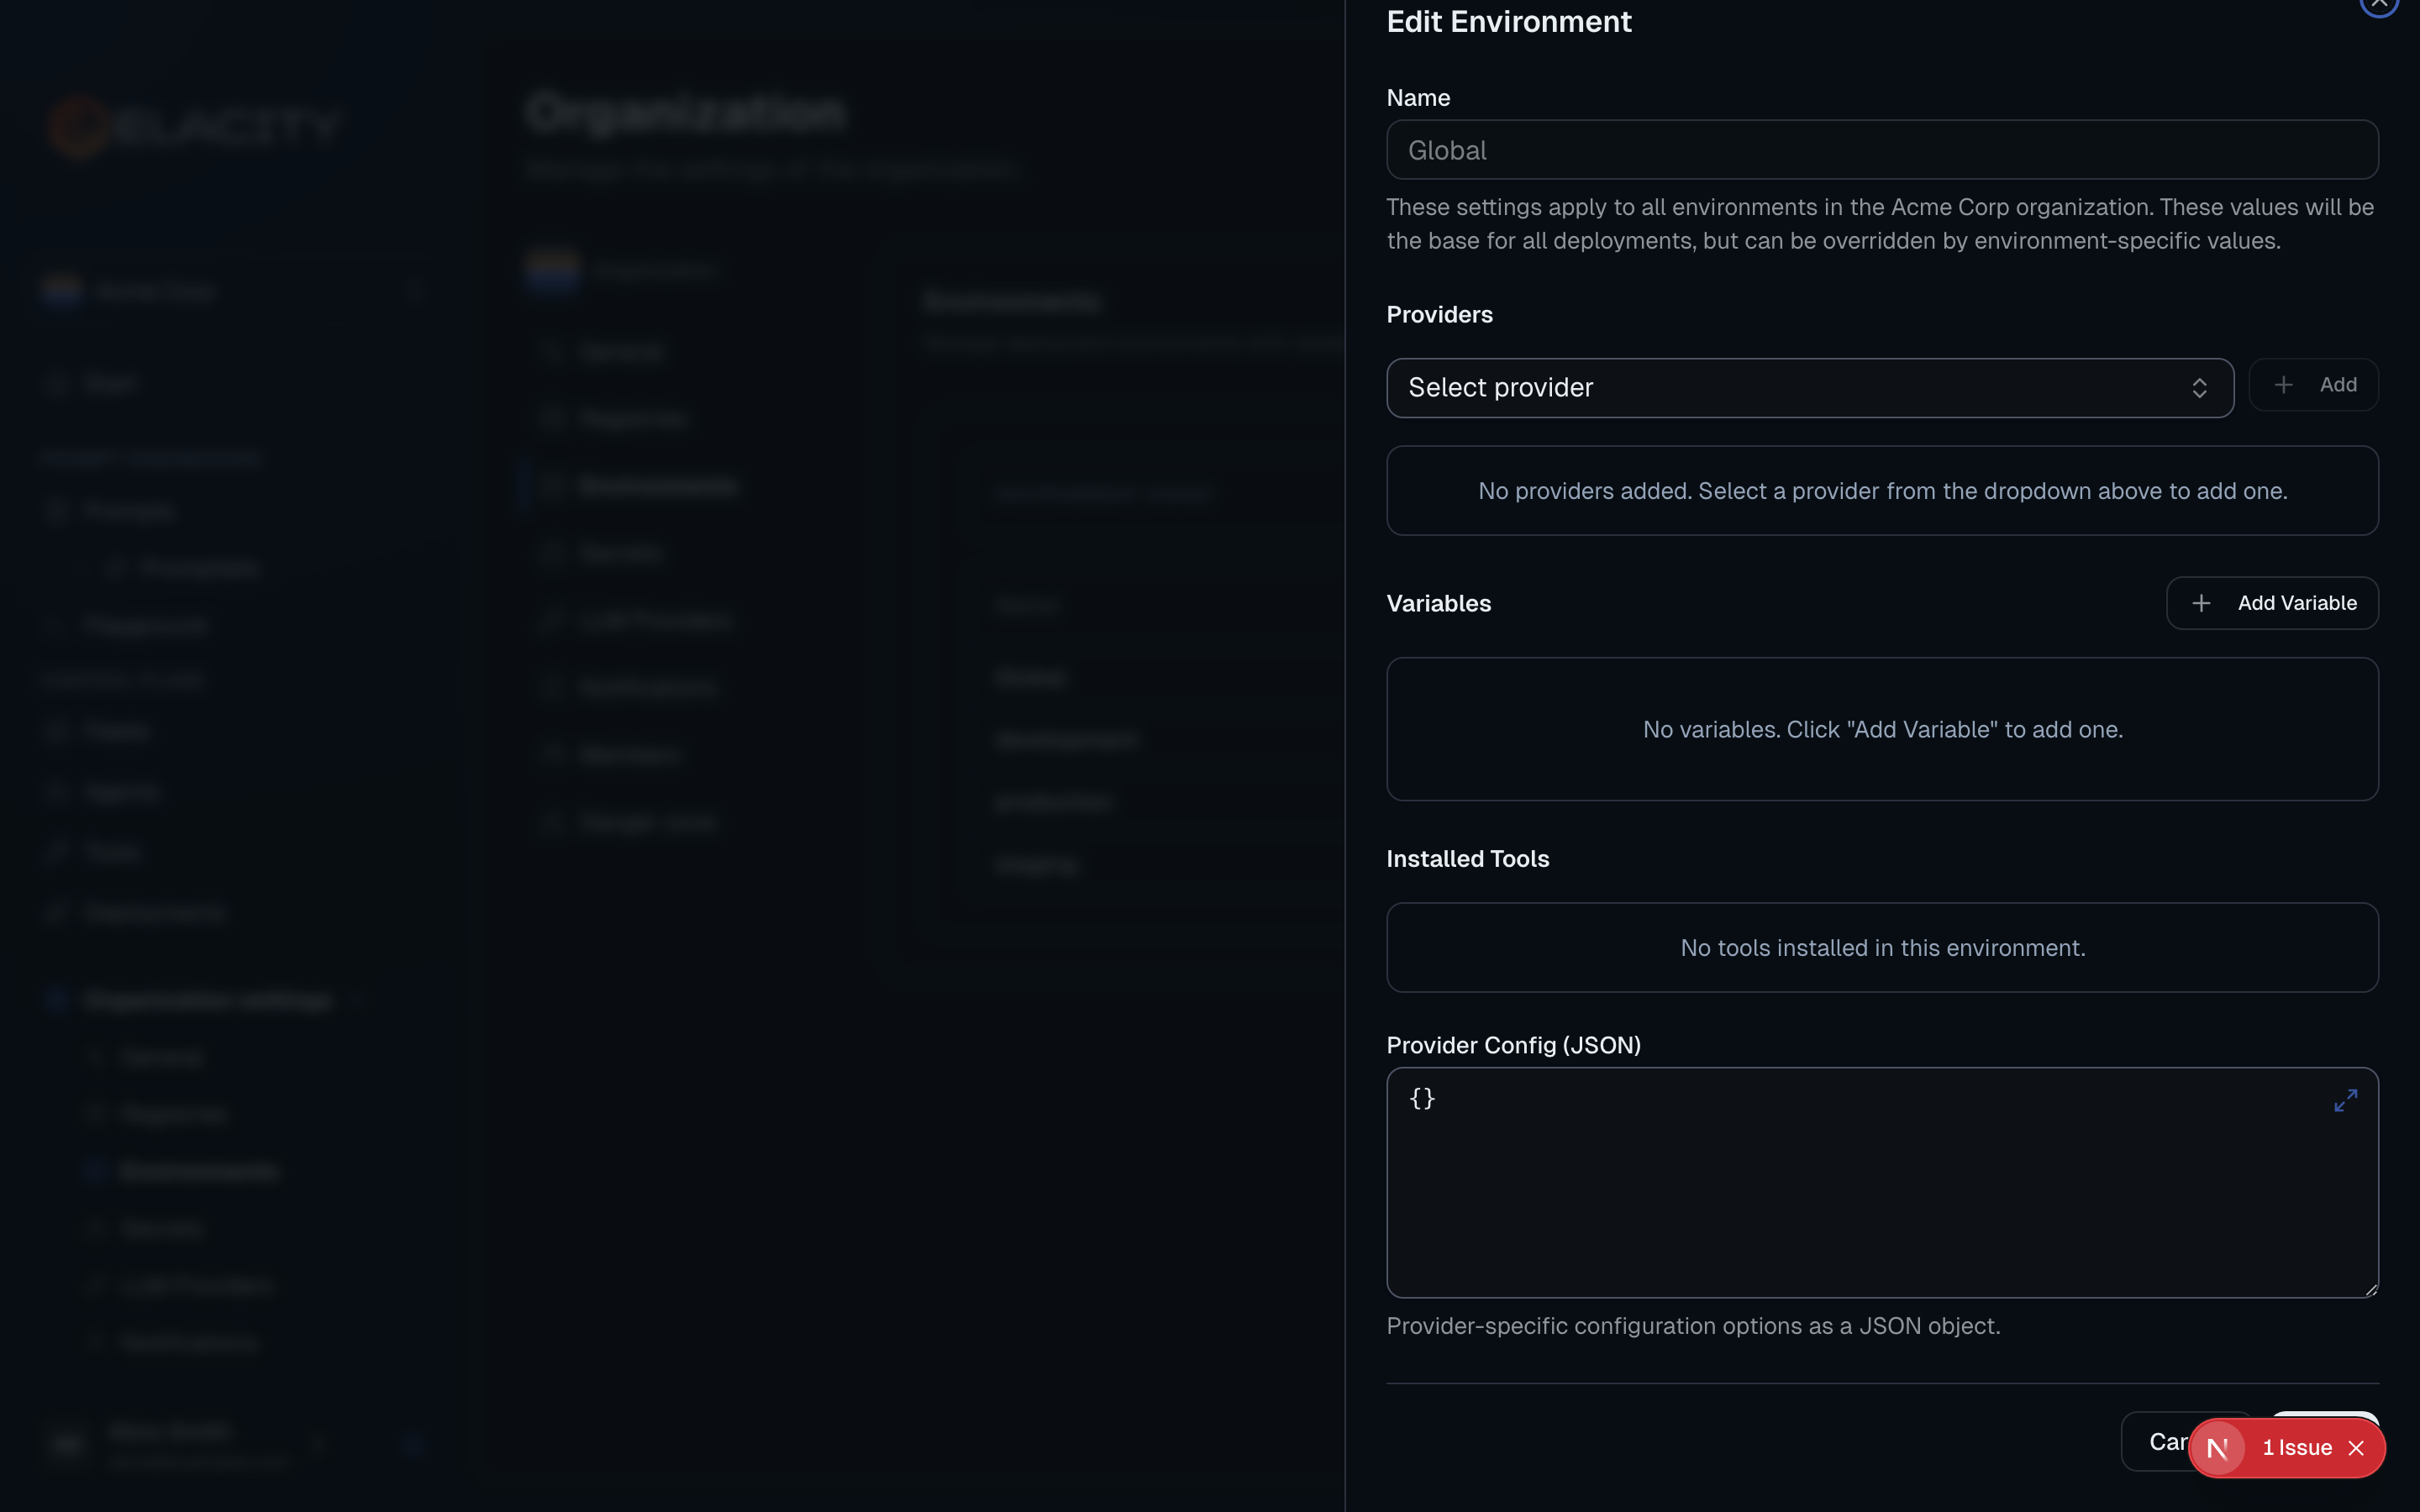
## Add an Environment
Environments let you isolate provider credentials, variables, and configuration per deployment stage. A typical setup includes `dev`, `staging`, and `prod` environments.
Click **Environments** in the sidebar.
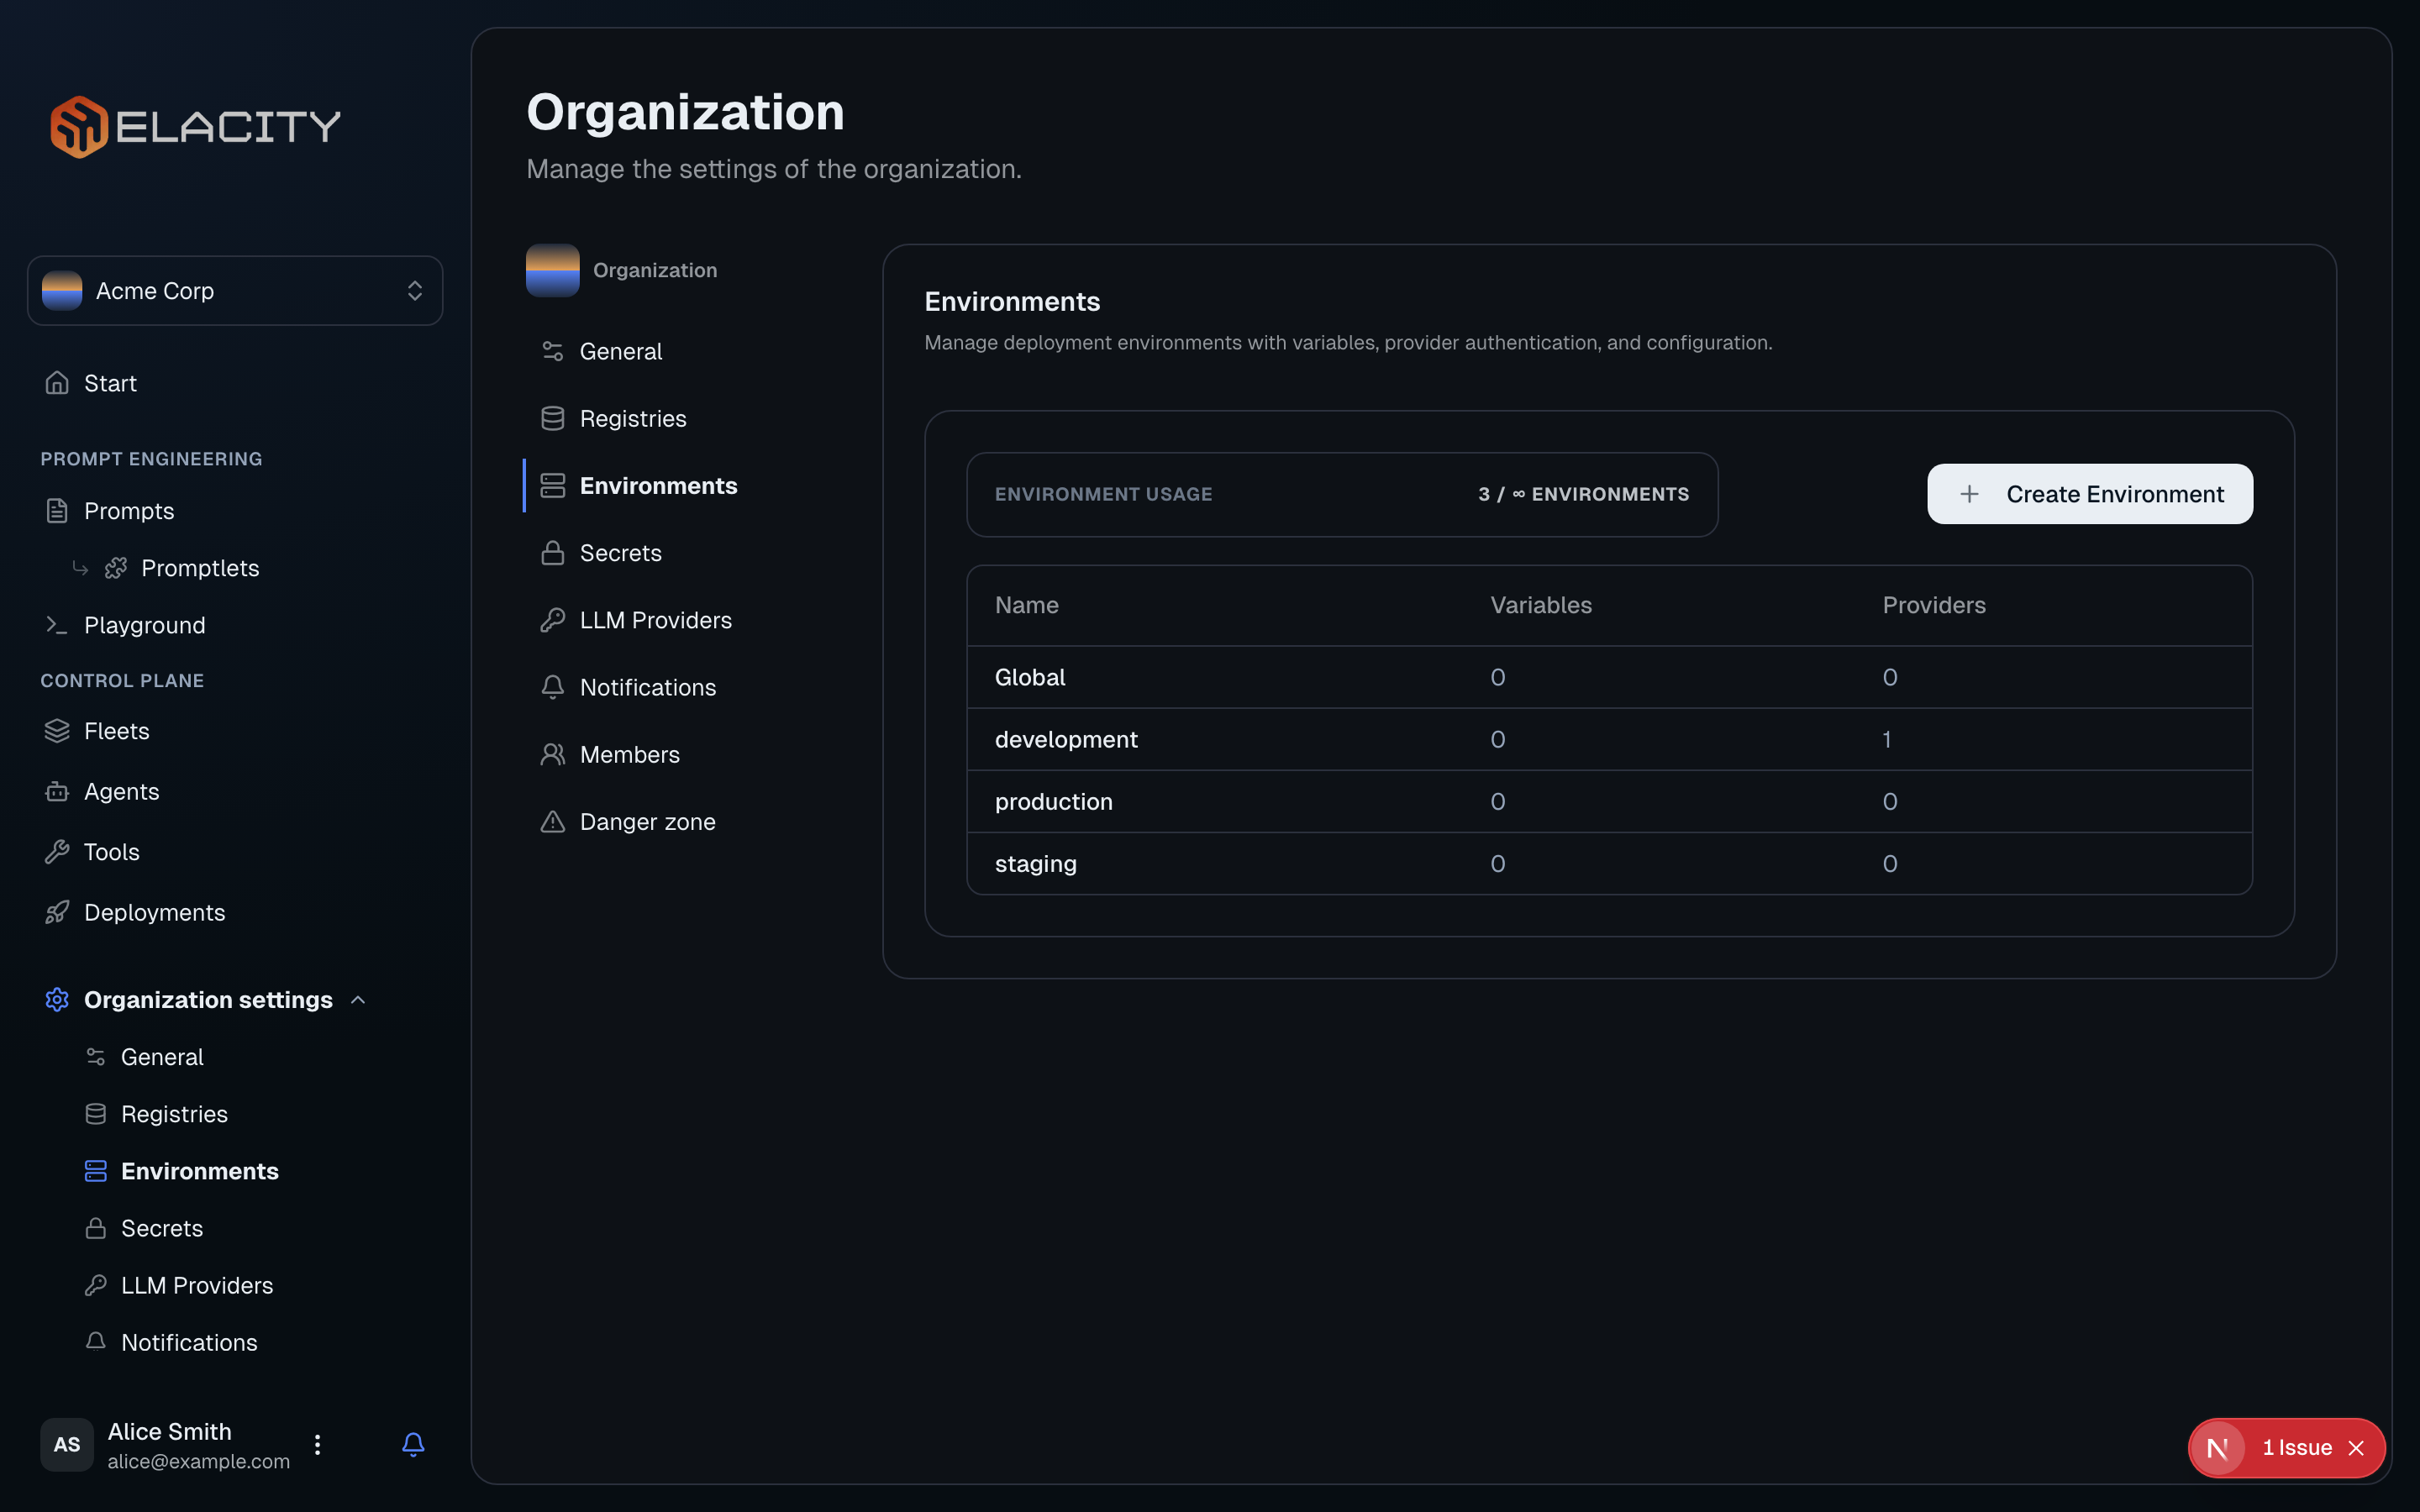
Click **Create Environment** and give it a name (e.g. `dev`).
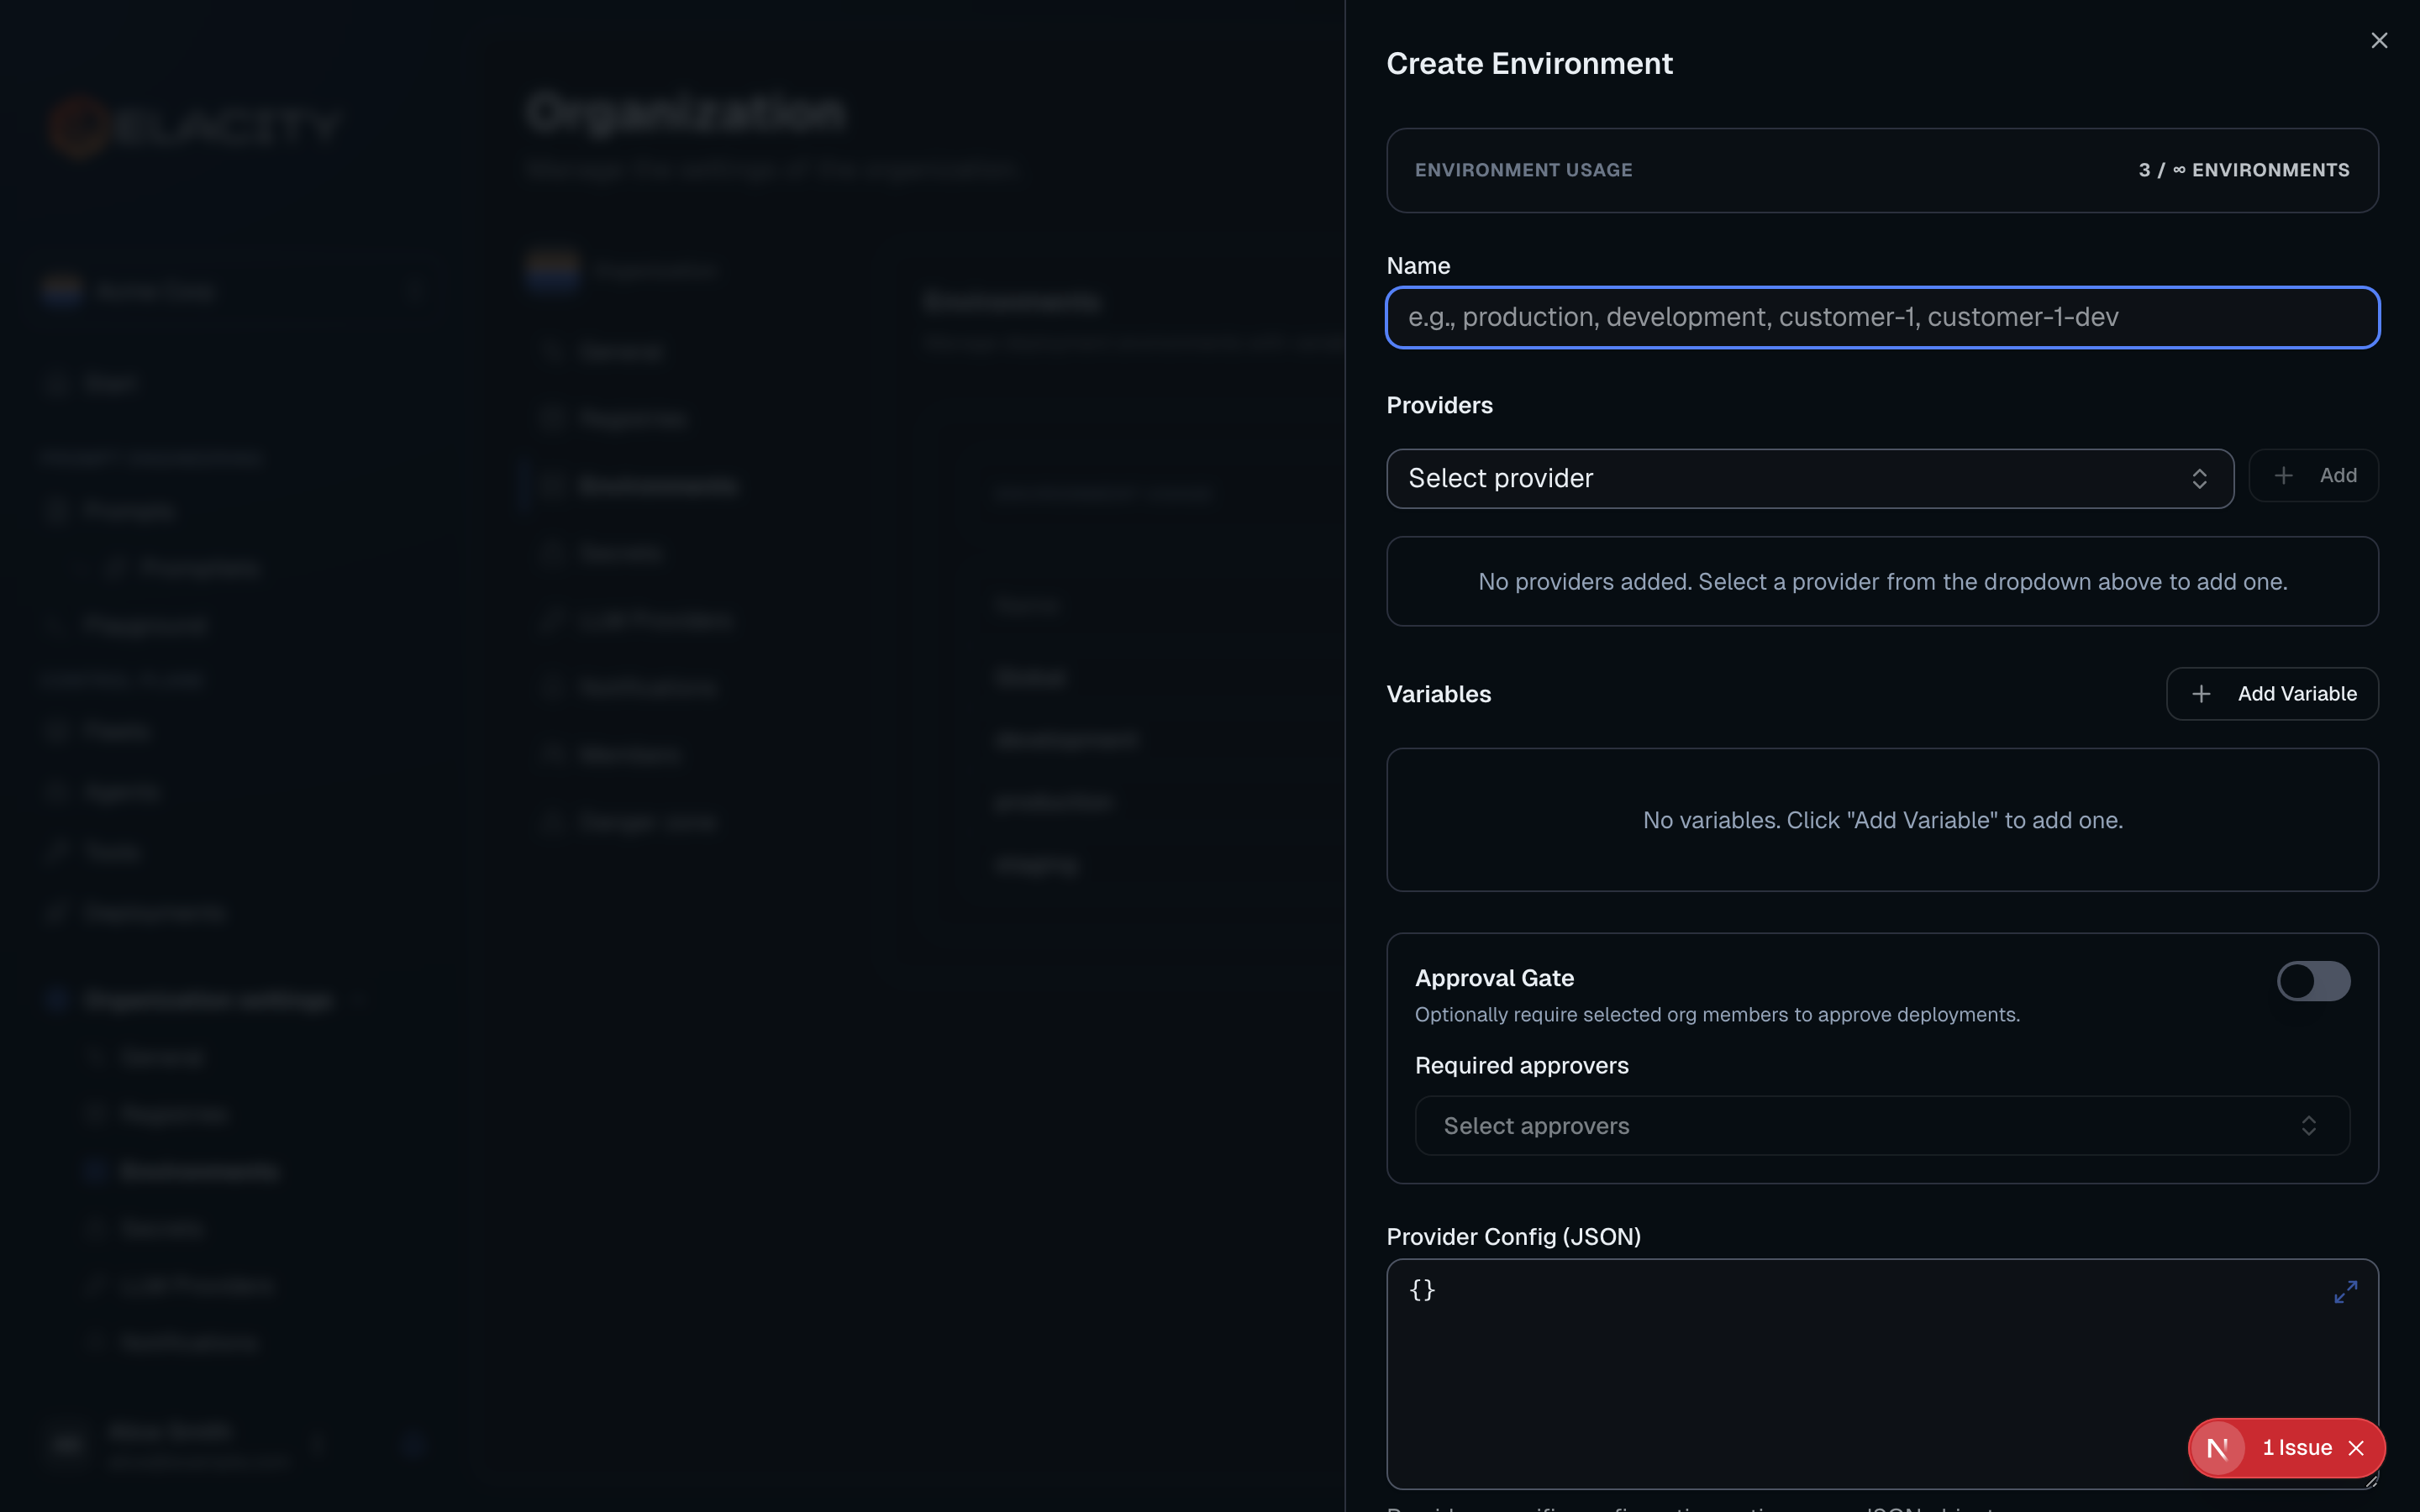
Within your new environment, set up a deployment provider (e.g. VAPI, Ultravox, or Telnyx). Add the provider's API credentials so Elacity can deploy agents on your behalf.
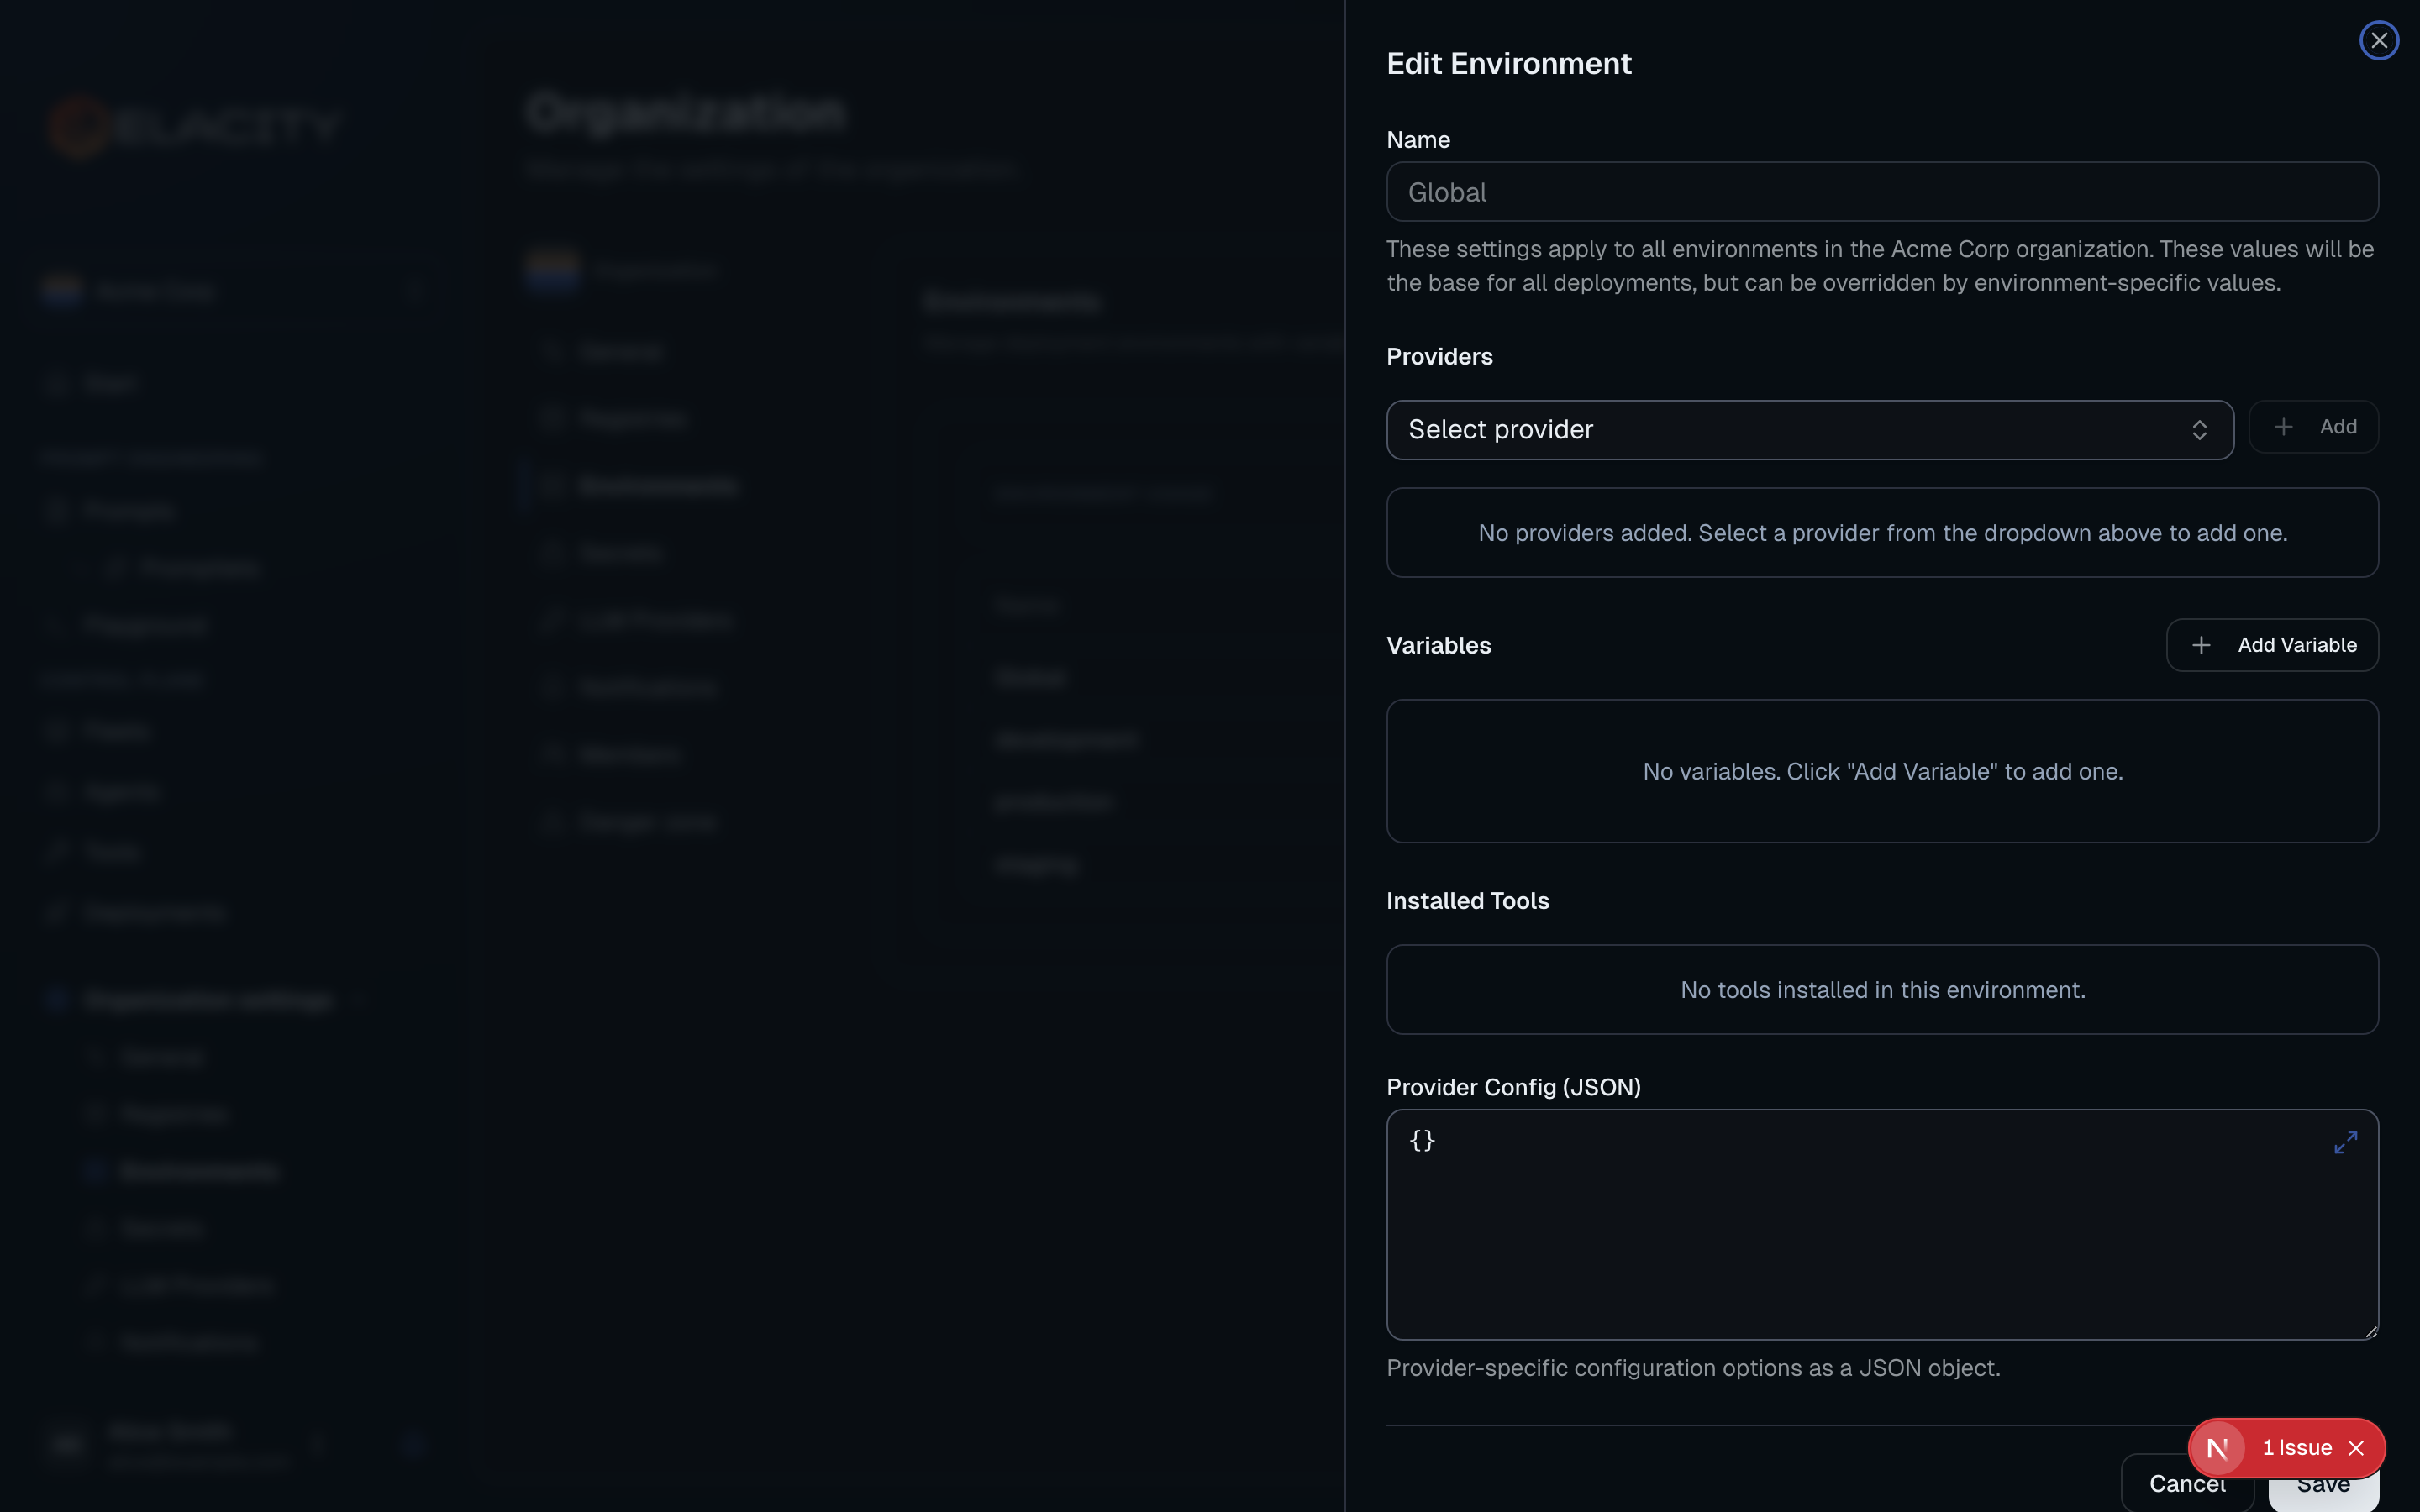
Define key-value pairs that get injected into your prompts at deployment time. For example:
| Variable | Value |
| ------------------ | ---------------------------------------------------- |
| `COMPANY_NAME` | Acme Corp |
| `SUPPORT_URL` | [https://support.acme.com](https://support.acme.com) |
| `ESCALATION_PHONE` | +1-555-0100 |
Variables are resolved during prompt compilation, so your prompt templates stay generic while each environment fills in the right values.
### Why use environments?
* **Safe testing** — validate changes in `dev` before they reach `prod`
* **Separate credentials** — each environment can use its own provider API keys
* **Variable substitution** — the same prompt template produces different output per environment (e.g. different support URLs, company names, or escalation contacts)
* **Approval gates** — optionally require team approval before deploying to sensitive environments
## Create a Fleet (Optional)
Fleets are logical groupings of agents that share default configuration. If you only have a few agents, you can skip this step and come back later.
Click **Fleets** in the sidebar, then click **Create Fleet**.
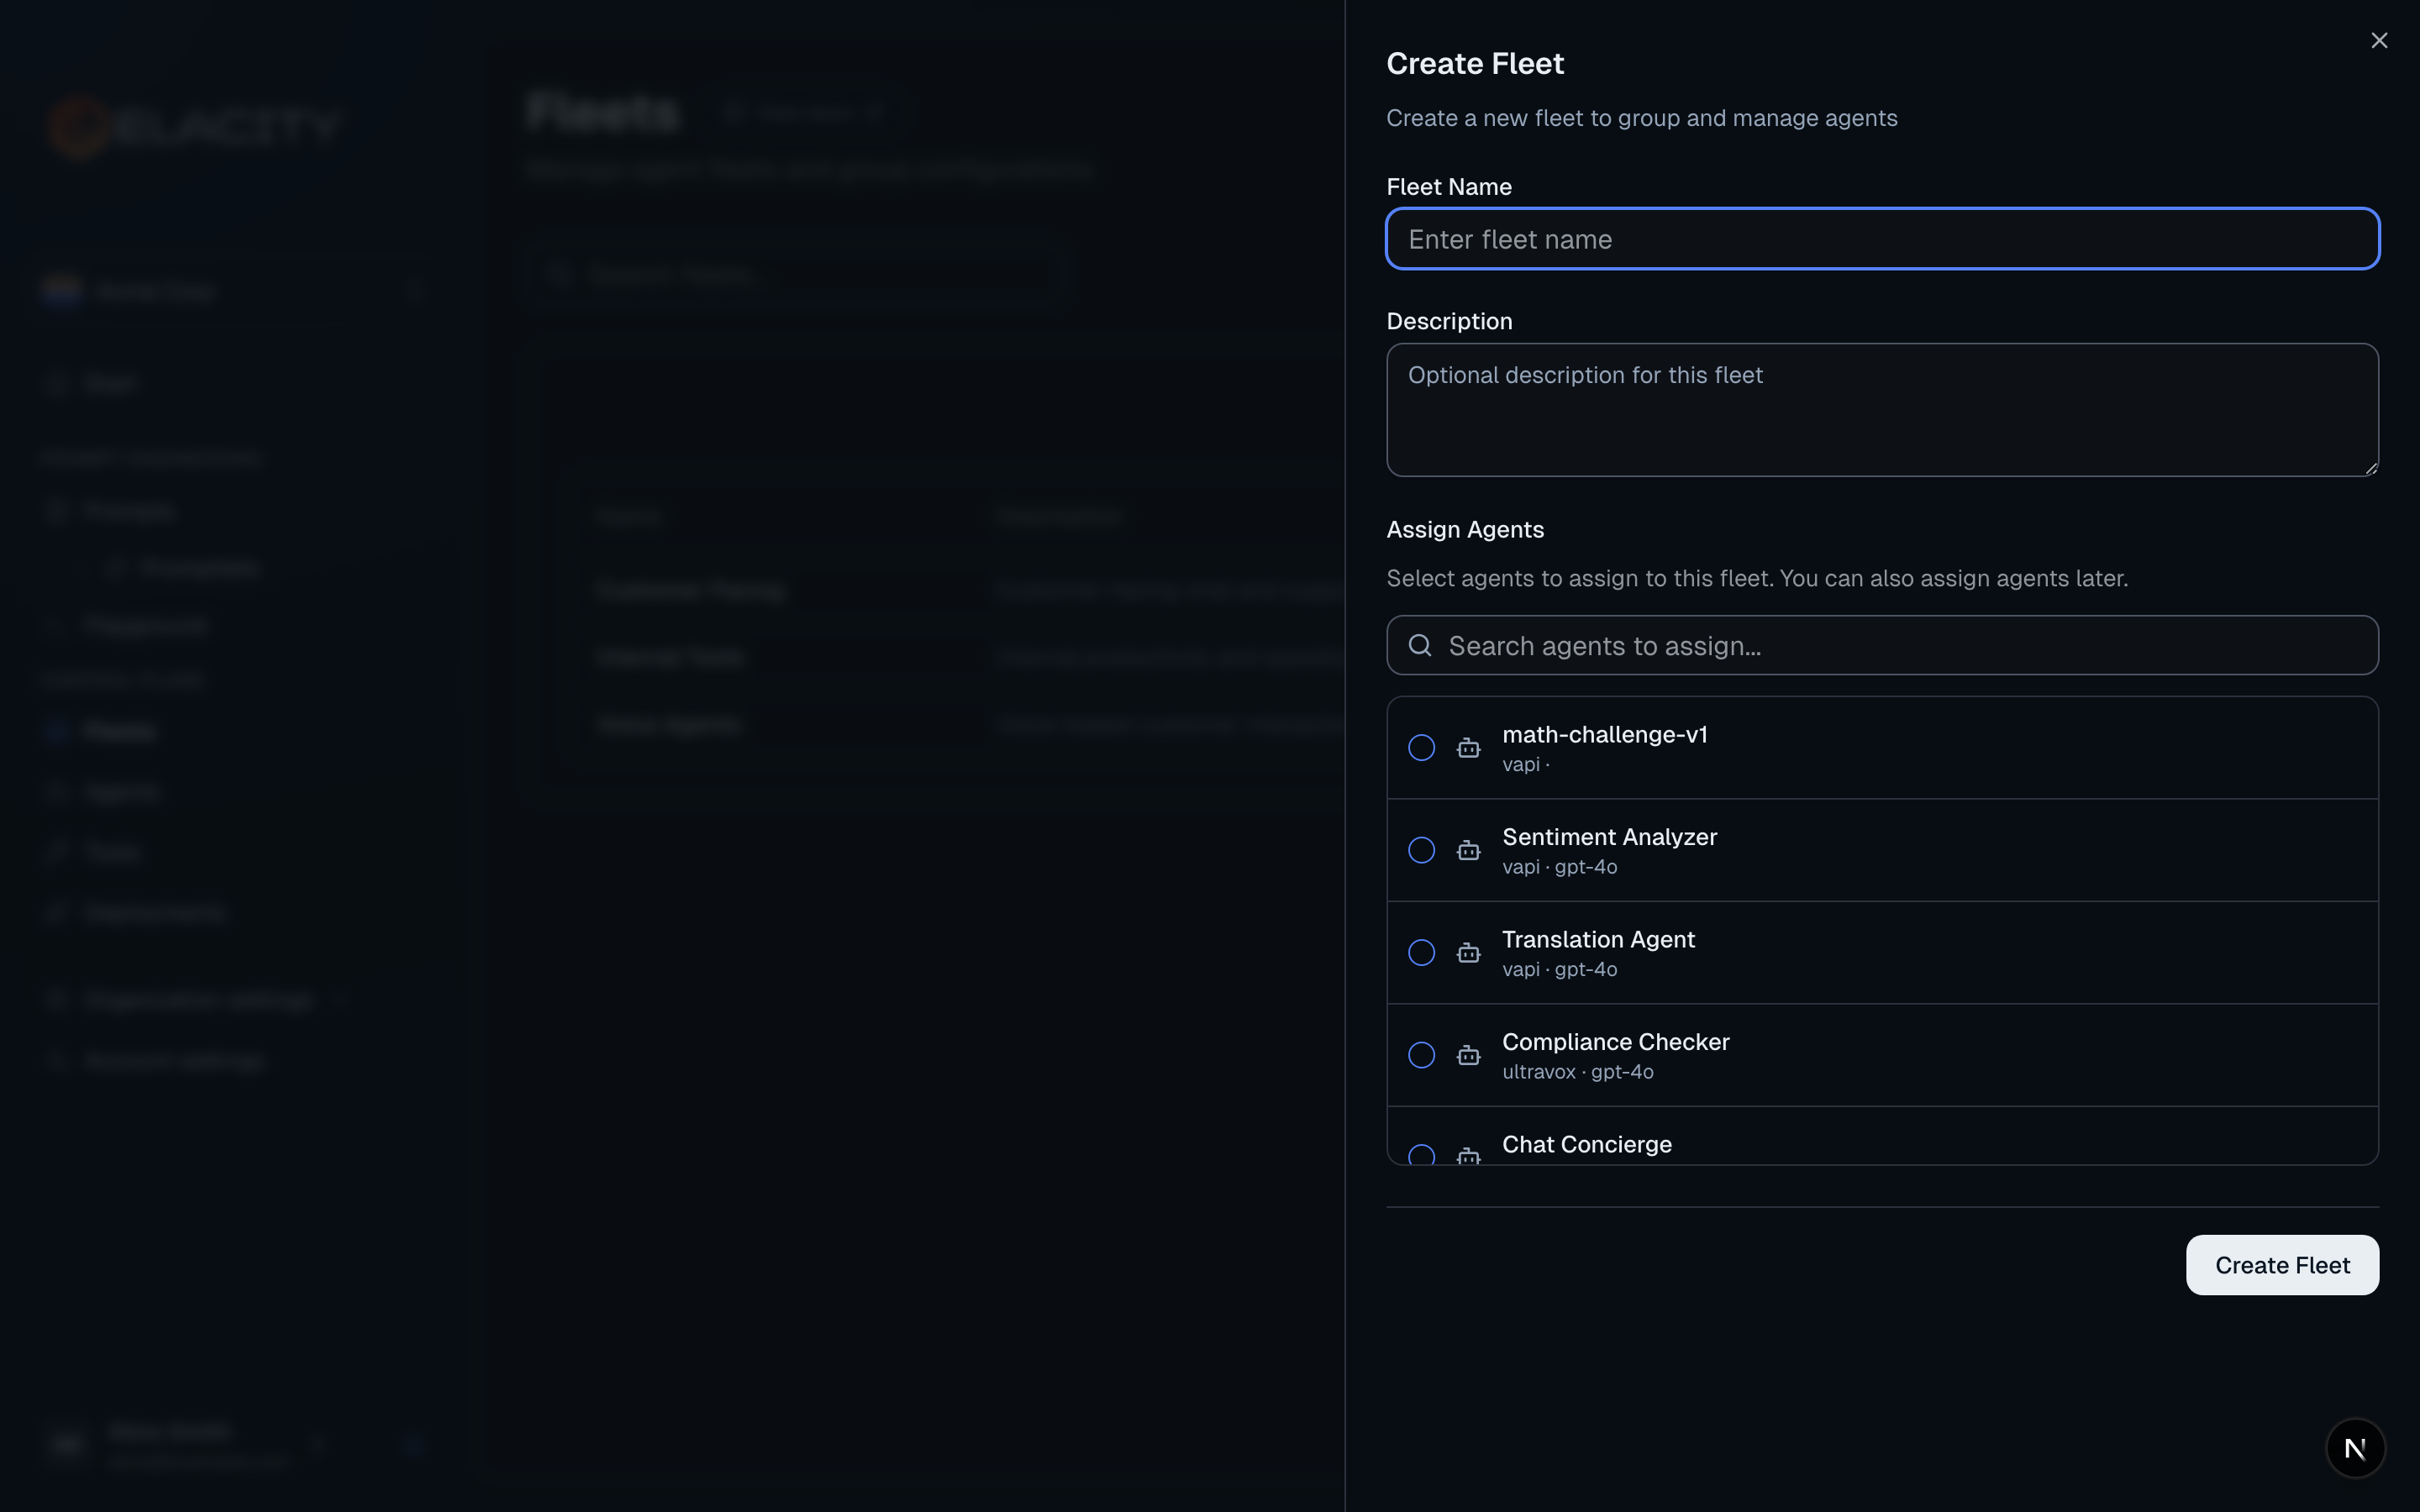
Give your fleet a name and description. Optionally set default configuration (provider, model, temperature) that all agents in the fleet inherit.
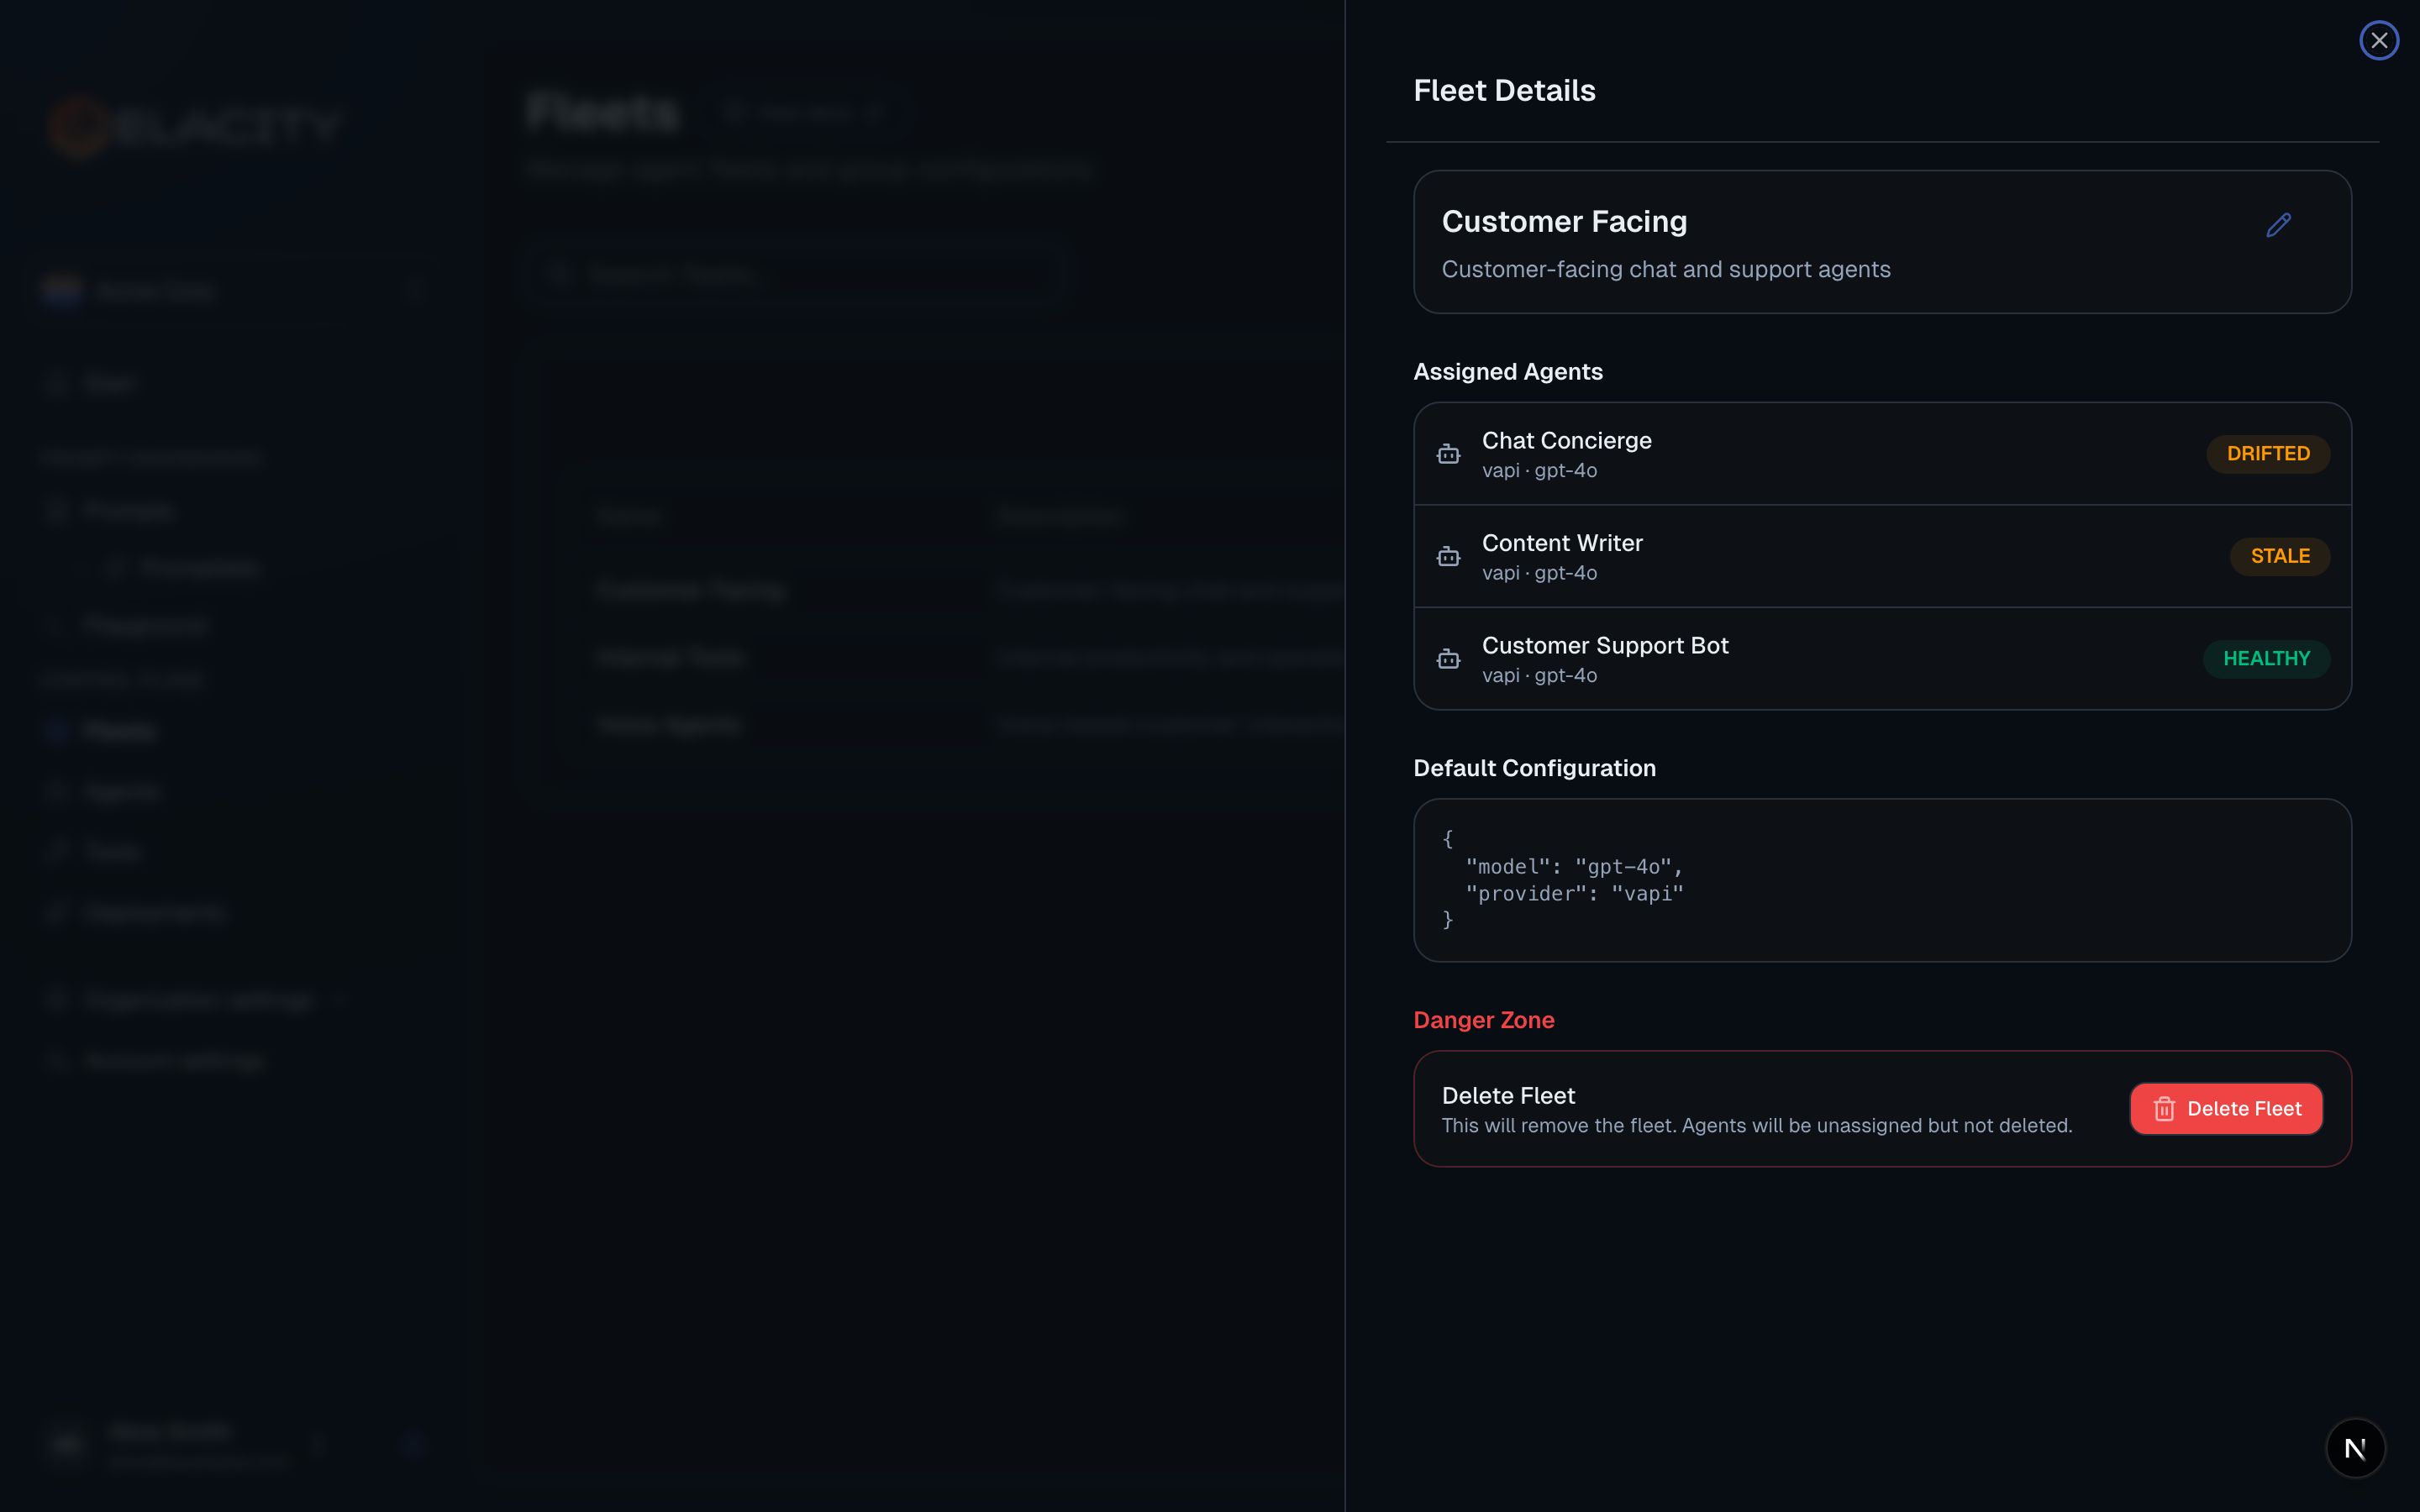
### Why use fleets?
* **Inherited defaults** — set a default model and provider once; every agent in the fleet picks it up
* **Bulk operations** — deploy or update all agents in a fleet at once
* **Organization** — group agents by function (e.g. "Customer Support", "Sales Outbound", "Internal Tools")
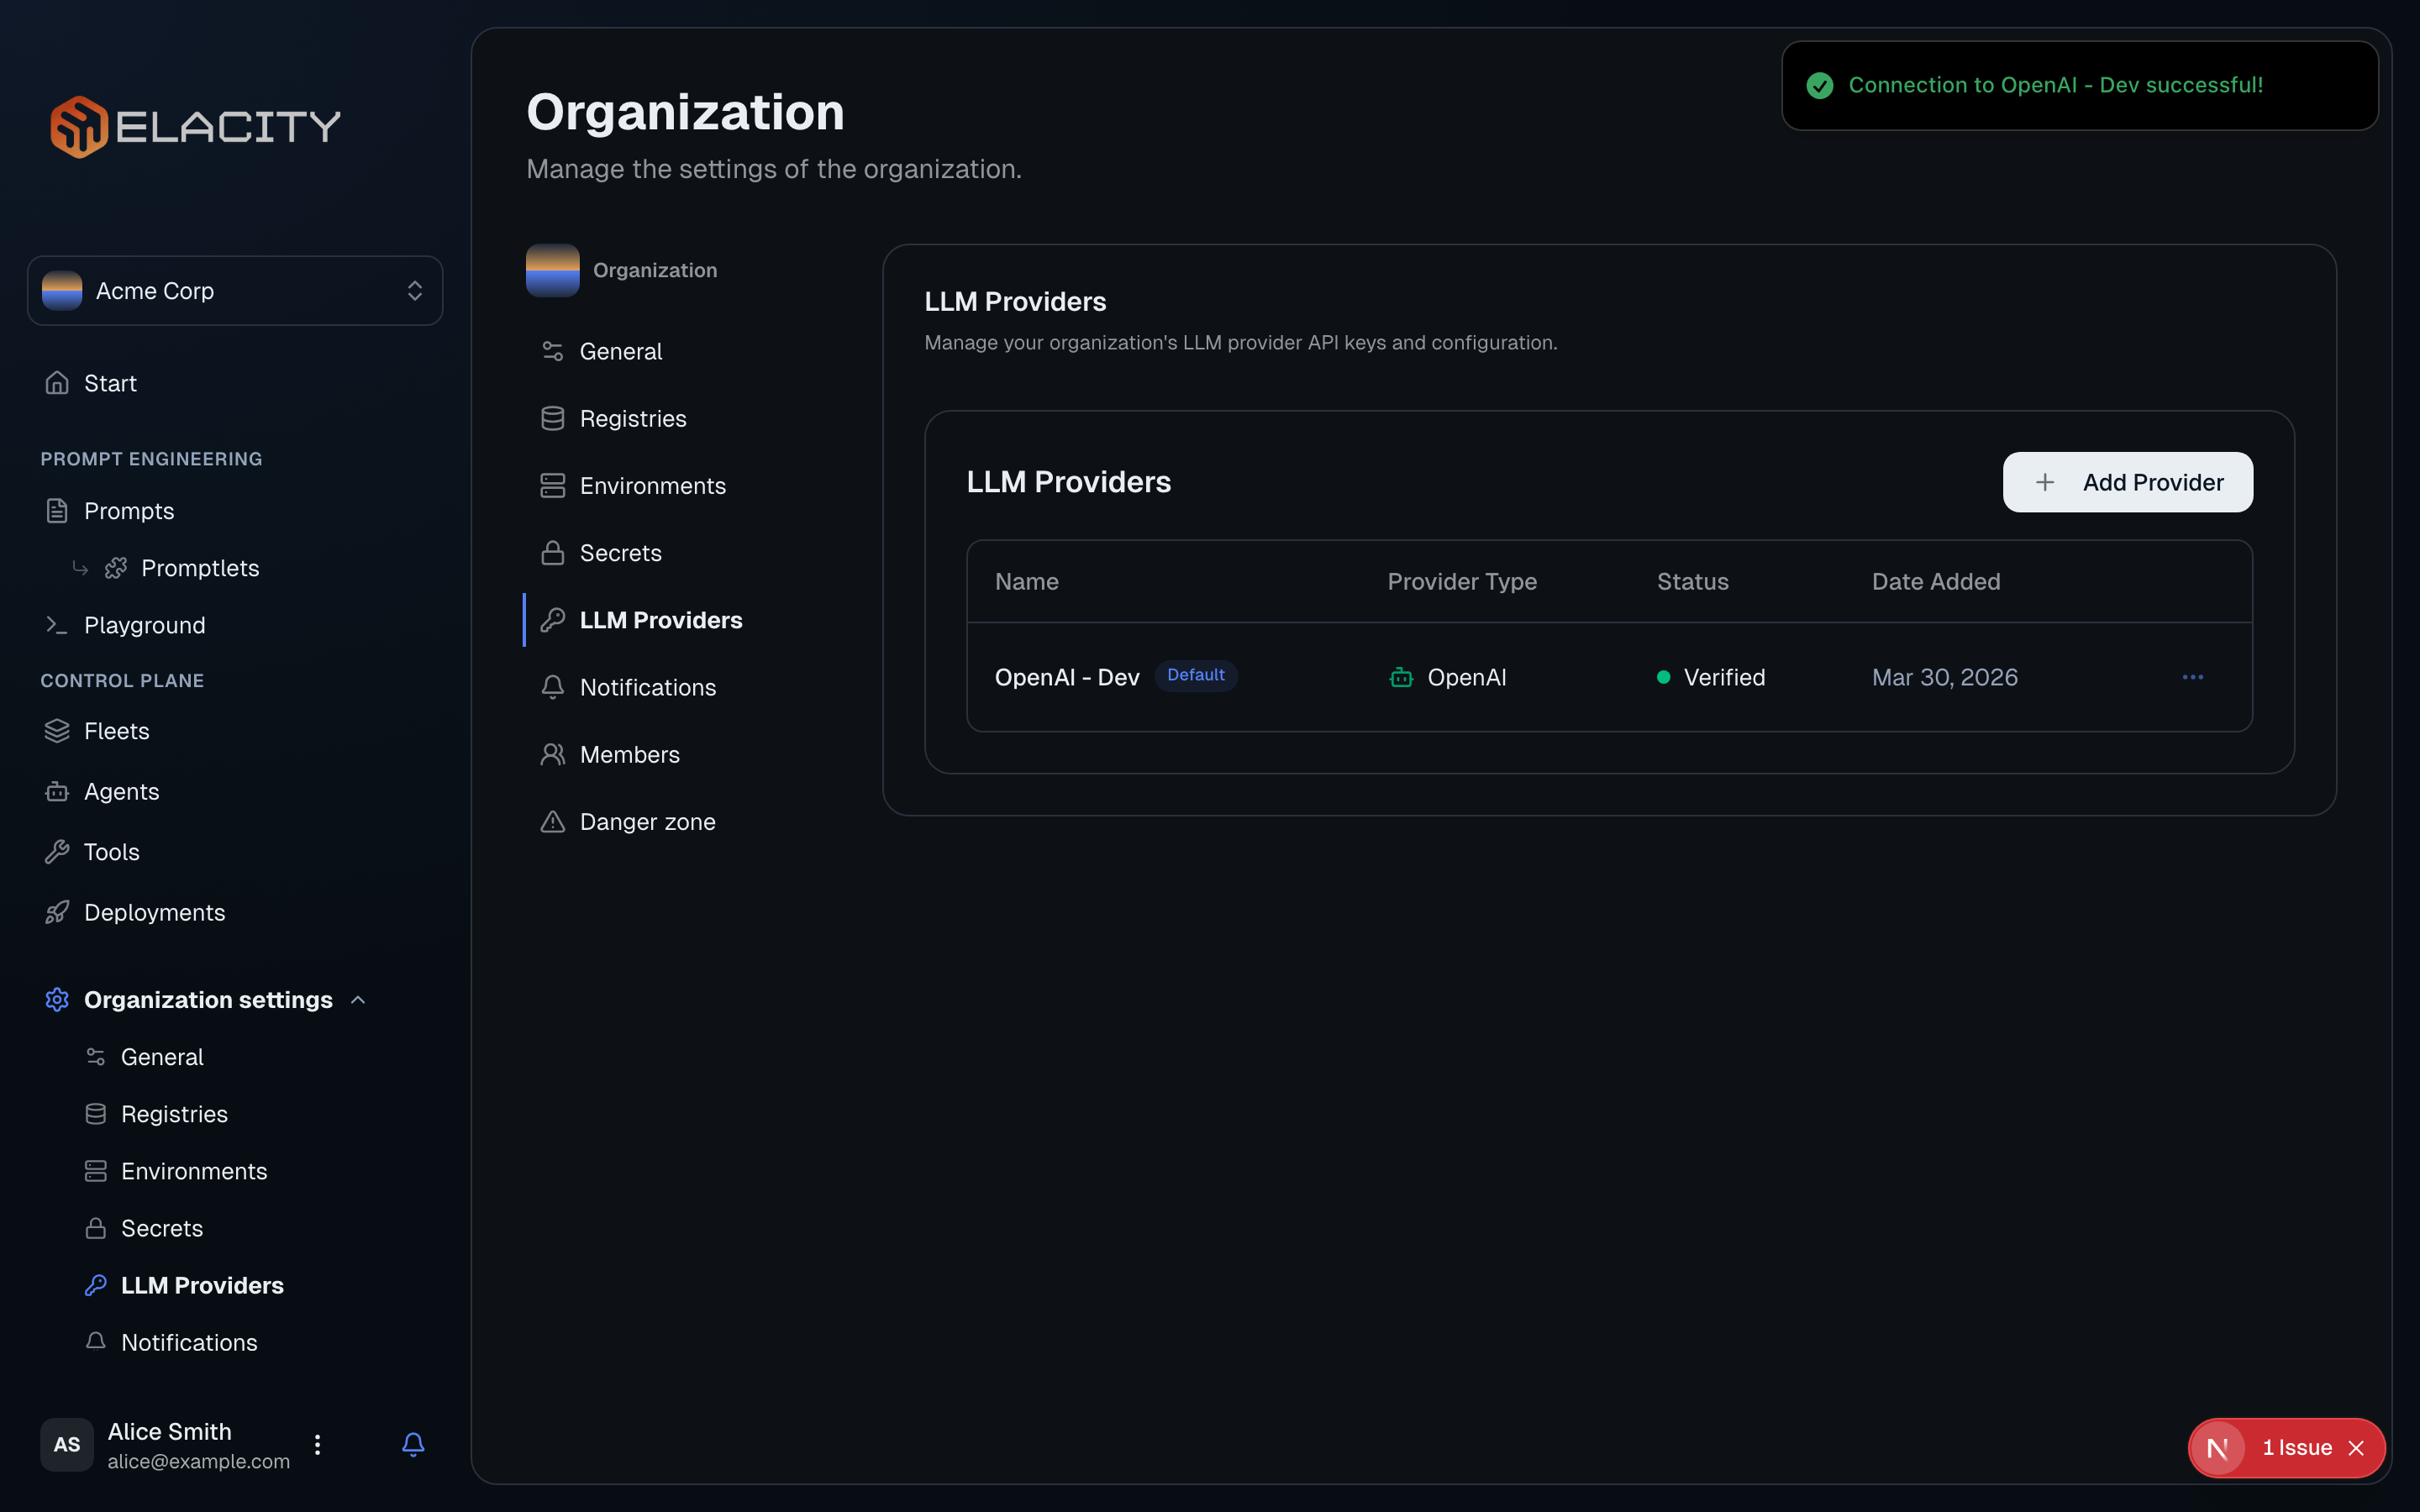
## Set up an LLM Provider (Optional)
LLM providers give Elacity access to language models for the playground and prompt compilation previews. This is separate from the deployment provider credentials you set in an environment.
Go to **Settings → LLM Providers**.
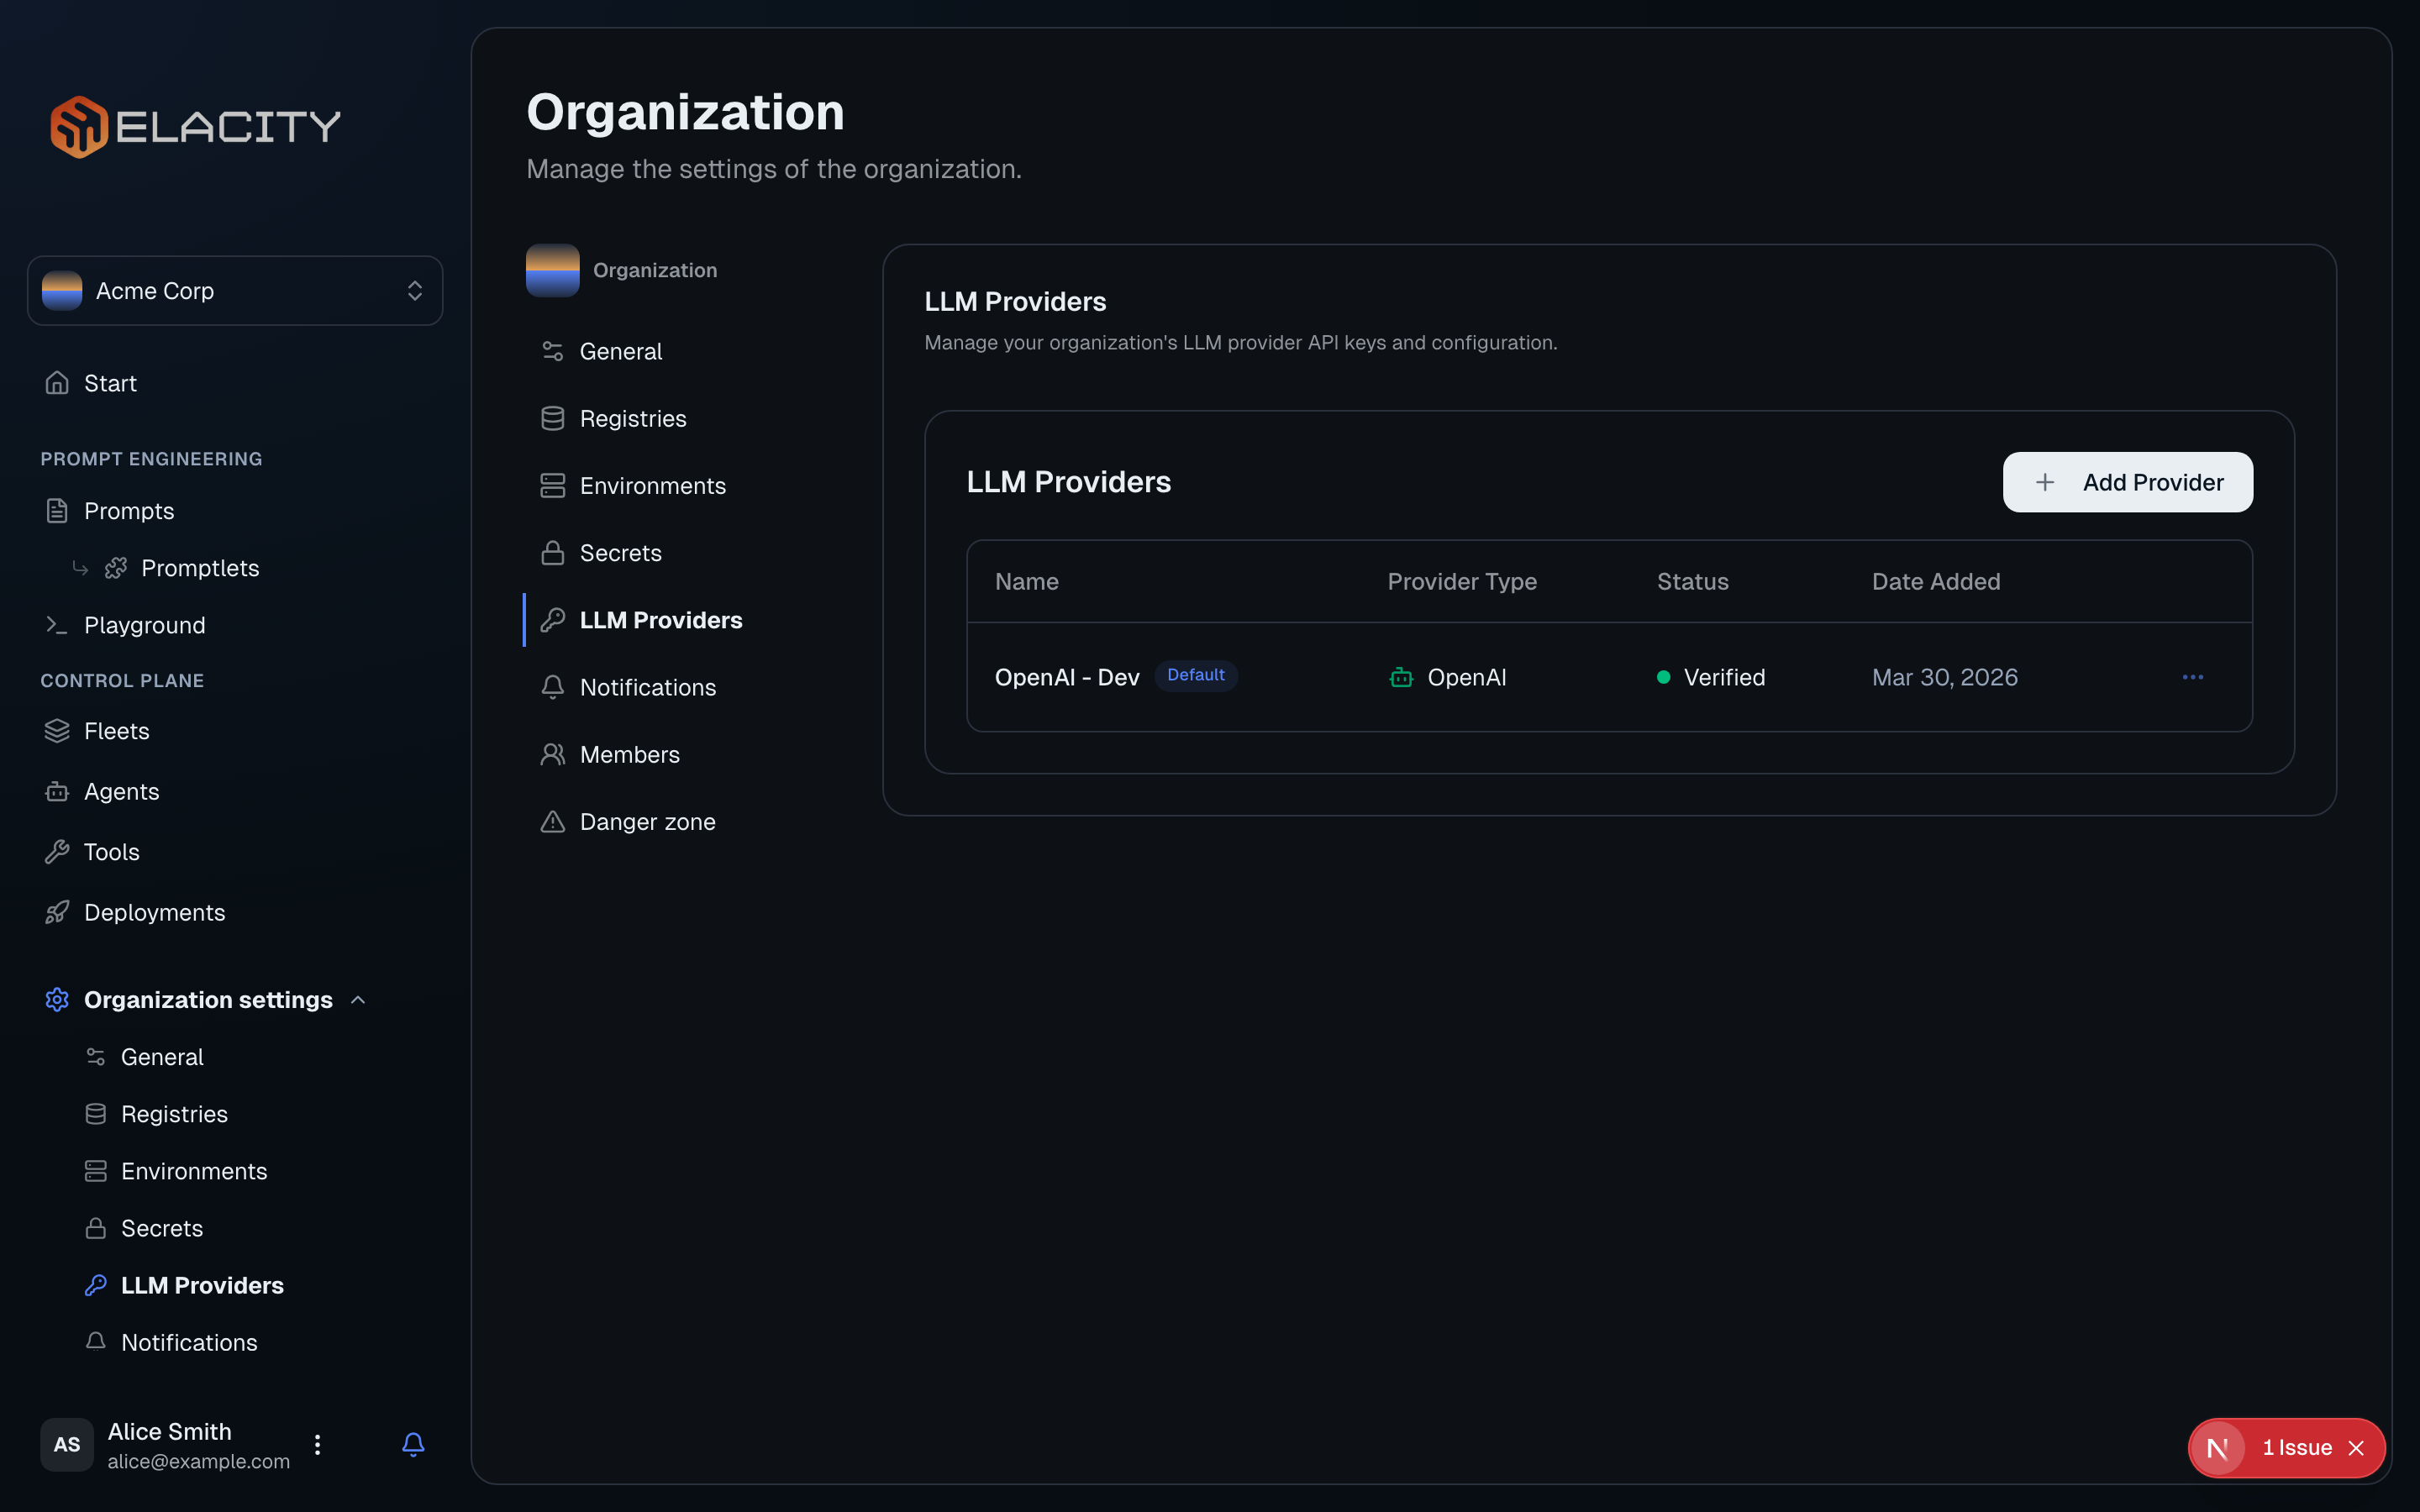
Click **Add Provider** and select your provider (OpenAI, Anthropic, Google, Groq, etc.). Enter your API key and optionally set it as the default.
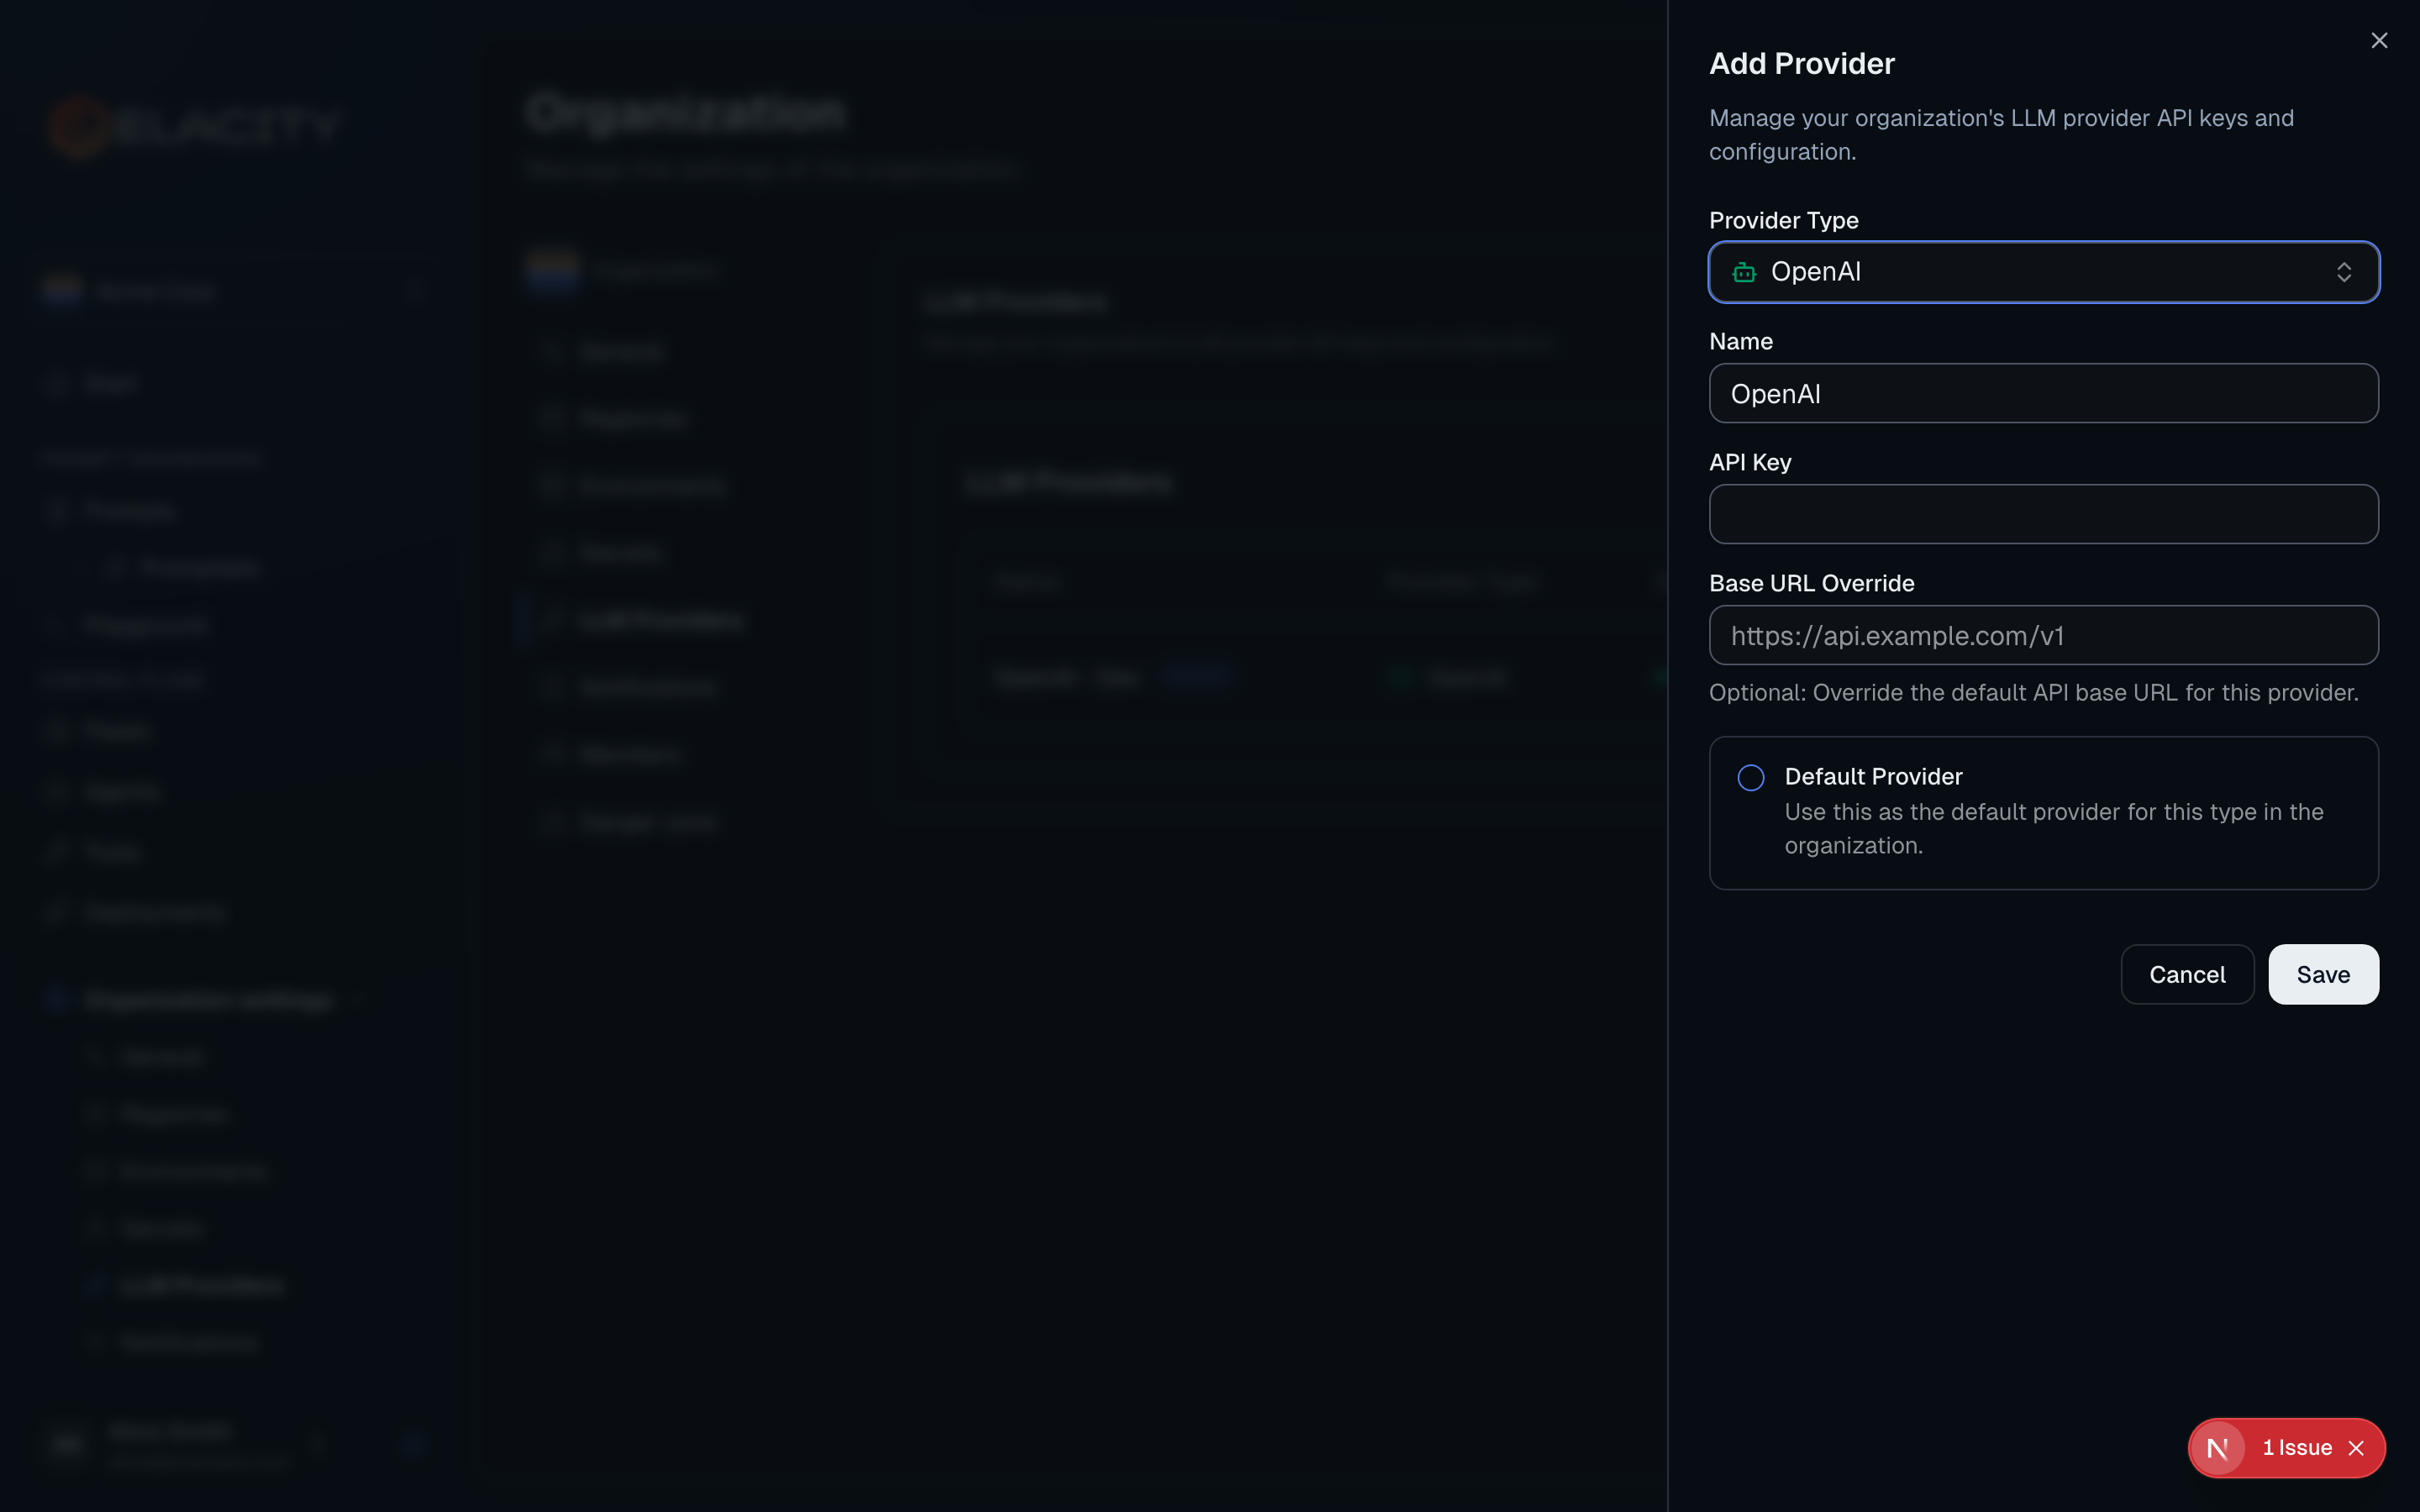
Click **Test** to verify the API key works. You should see a list of available models.
### Why set up an LLM provider?
* **Playground** — test prompts interactively against real models before deploying
* **Model discovery** — browse available models from each provider
* **Encrypted storage** — API keys are encrypted at rest, not stored in plaintext
* **Shared access** — team members can use the playground without needing their own API keys
## Next steps
Author, version, and pull prompts at runtime
Deploy a voice agent with tools to VAPI
Explore the full API